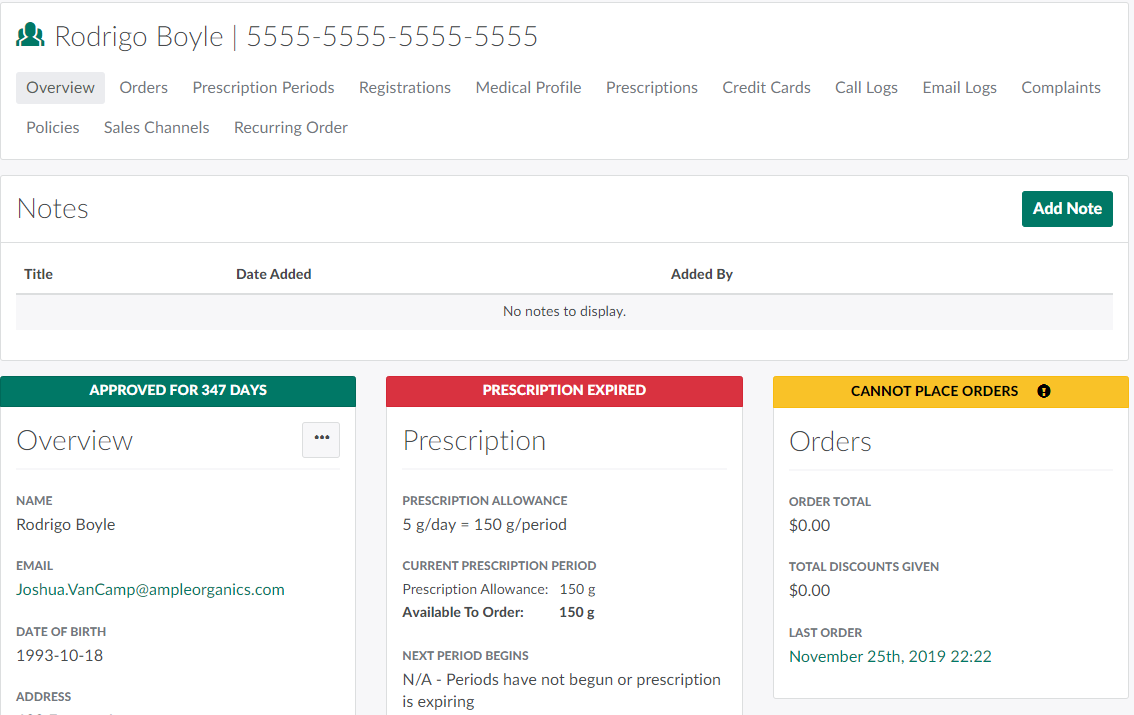
A client must have an active prescription before a Customer Service Representative–or CSR–can approve them to purchase cannabis products. Follow the steps below to add a new prescription.
Required permission(s) client_read, physician_read, client_create
-
In the Clients module, select a client. This opens the Client's Profile.
-
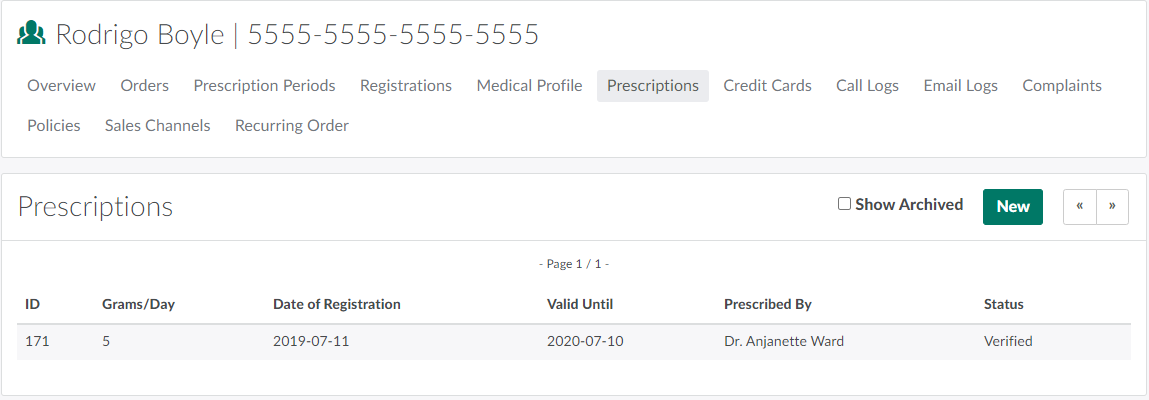
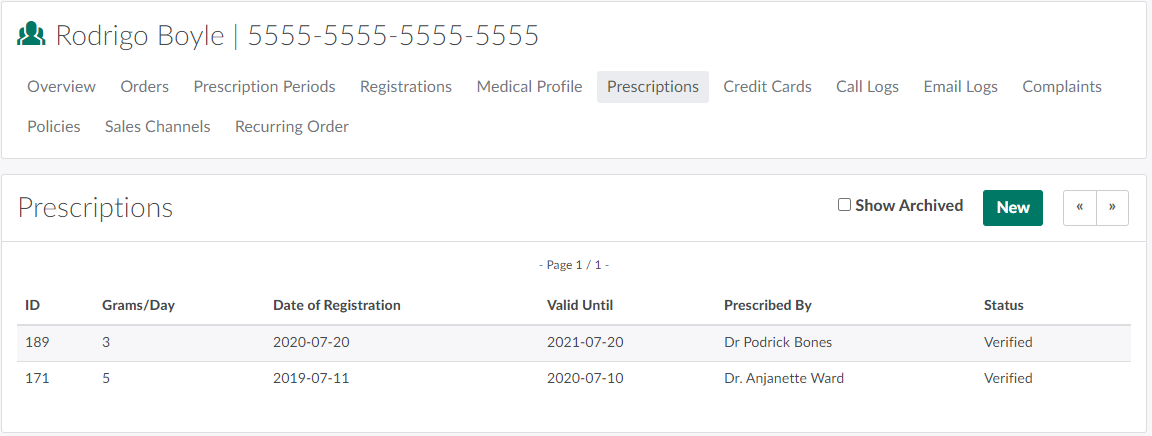
Open the Prescriptions tab.
-
Click New. This opens a new Prescription page.
-
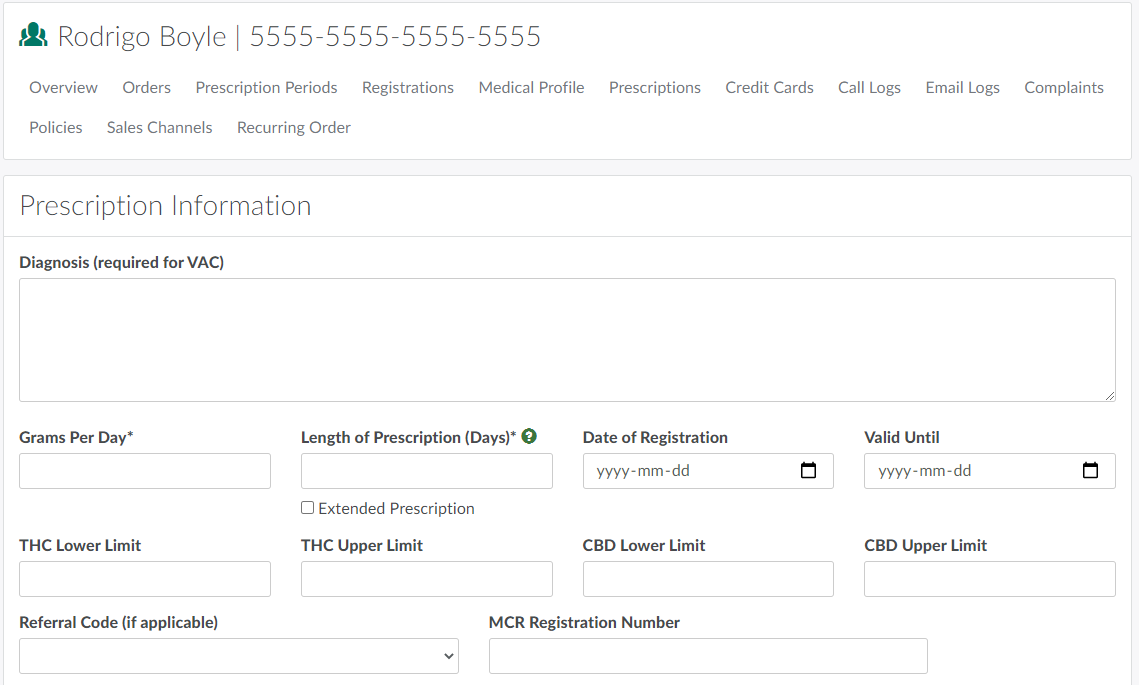
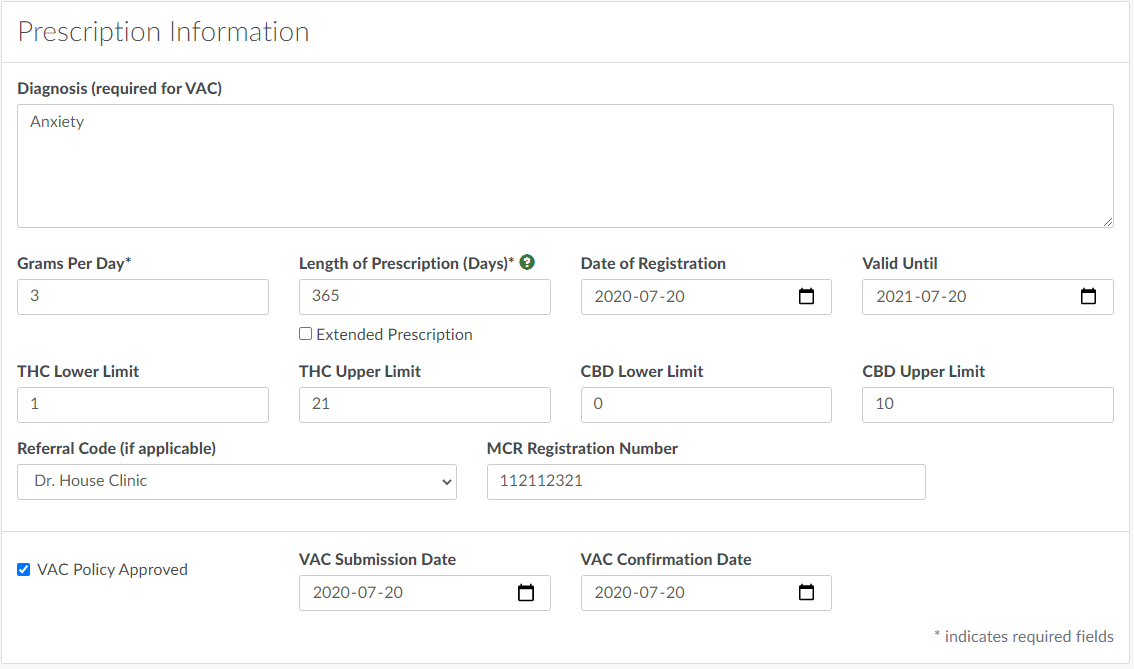
Enter details of the prescription in the fields provided in the Prescription Information section.
-
Diagnosis: The reason the patient has been prescribed cannabis.
-
Grams Per Day: The amount of cannabis allotted per day.
-
Length of Prescription (Days): How many days the prescription will be in effect. This is automatically populated when the Registration and Valid Unit dates are filled in.
- Note*: If the prescription was affected COVID-19 extension, check the Extended Prescription box below the field. This only applies to prescriptions set to expire between March 13, 2020 and September 30, 2020.*
-
Date of Registration: The client's registration date.
-
Valid Until: The date on which the prescription expires.
-
THC and/or CBD range: The lower and upper limits of THC and/or CBD potency the client is permitted. Leaving the THC/CBD fields blank indicates that the client has no cannabinoid potency limitations.
-
Referral Code: The relevant referral code, if applicable.
-
MCR Registration Number: The client's Medical Cannabis Registry number.
-
VAC Policy Approved: If the prescription is through Veteran's Affairs Canada-or VAC-this checkbox indicates whether or not VAC has approved the prescription.
-
VAC Submission Date: The date on which the prescription was submitted for VAC approval.
-
VAC Confirmation Date: The date on which VAC approved the prescription.
-
-
If the client's prescription allows them to purchase and possess cannabis plants and seeds, fill out the fields in the Plants or Seeds section. Otherwise, leave this section blank.

- Max Storage Quantity: The maximum total weight, in grams, of cannabis a client can store at any given time.
- Production Area: Indicates whether the client can grow plants inside, outside, or both.
- Max Indoor Plants: The maximum number of plants the client can grow inside.
- Max Outdoor Plants: The maximum number of plants the client can grow outside.
-
Select the prescribing physician.
-
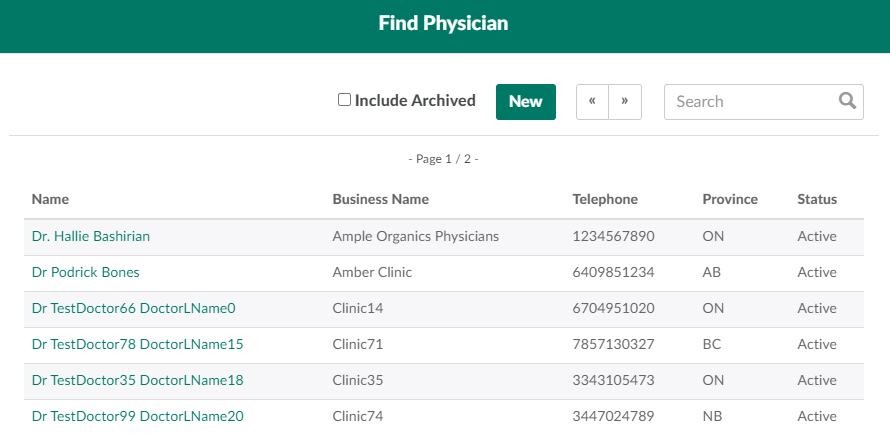
Scroll down to the Physician section, and click Find.This opens the Find Physician modal.
-
Click the client's physician to select them. If the client's prescribing physician does not appear on the Find Physician modal, click New to Add a New Physician.

-
-
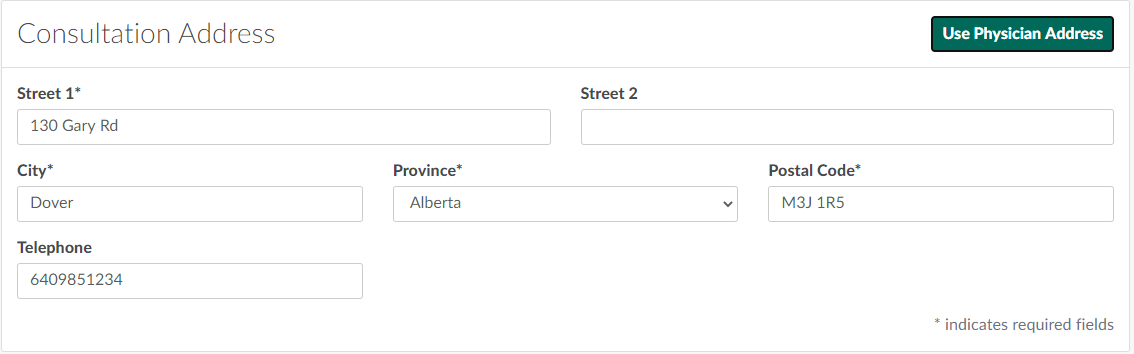
Enter information about the consultation address in the fields provided in the Consultation Address section. If the medical consultation took place at the physician's clinic, click Use Physician Address to auto-fill this section with the physician's address.
-
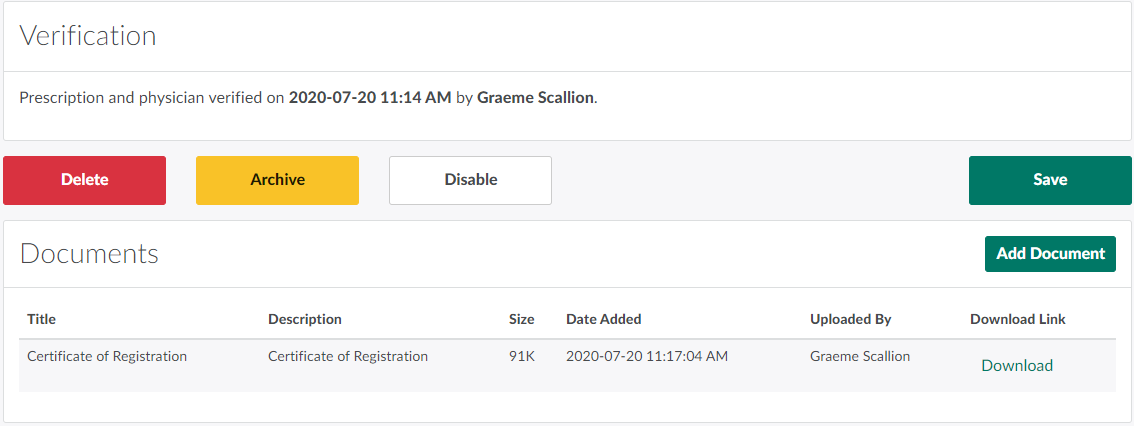
Verify the prescription and physician in the Verification section.

-
Click Save to add the prescription.
-
*Optional Step*: Upload a scanned copy of the client’s Certificate of Registration in the prescription's Documents section.
Visit the Policies tab to Add a Policy. Visit the Prescription Periods tab to view the client's prescription periods.
Adding a valid prescription is an essential step in approving a client to place orders. For more information, visit the Client Registration Process Guide.