When purchasing an order through the Client Portal or the Orders module, you can select an insurance policy for co-billing. Follow the steps below to configure a client's policy information.
Required permission(s): client_read, policy_create
-
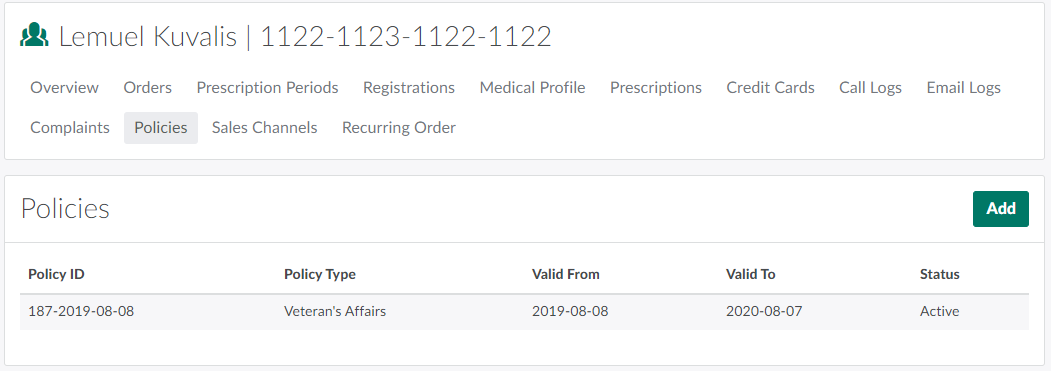
In the Clients module, select a client.
-
Open the Policies tab.
-
Click Add to open a new Policy page.
-
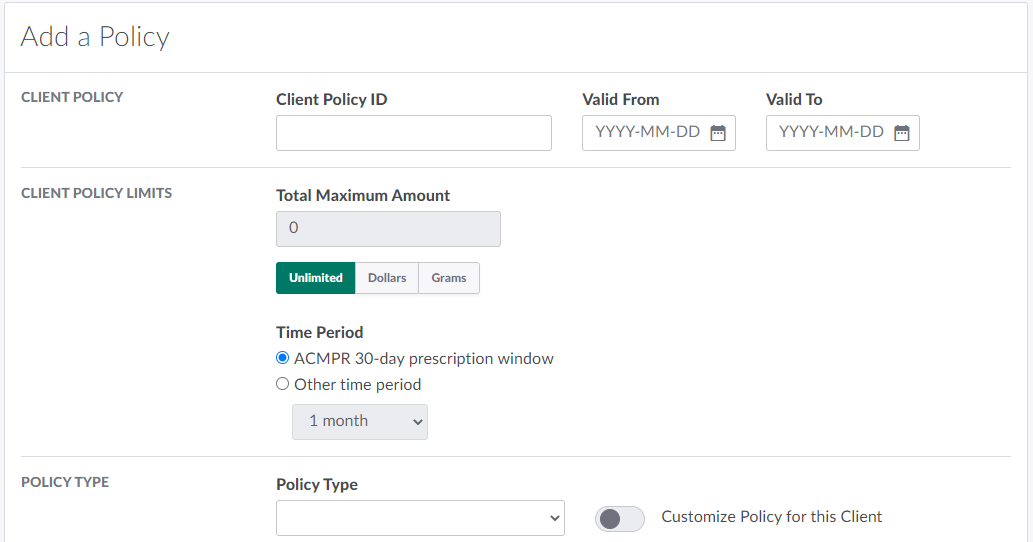
Fill out the details of the policy in the fields provided in the Client Policy and Client Policy Limits sections.
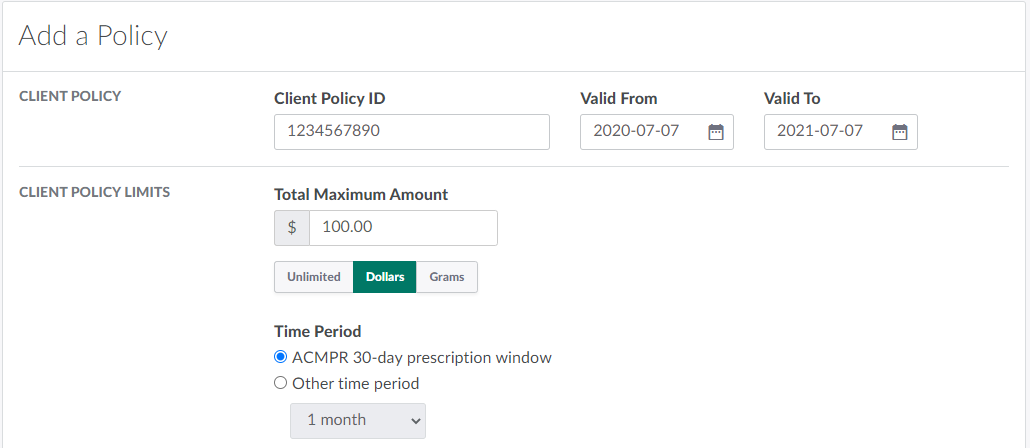
- Client Policy ID: The policy's unique ID number.
- Valid From and Valid To: The length of time for which the policy is valid.
- Total Maximum Amount: The maximum amount, in dollars or grams, covered by the policy. The policy may also have unlimited coverage.
- Time Period: Indicates the time period for the total amount limit to reset. This defaults to a 30-day prescription window.
-
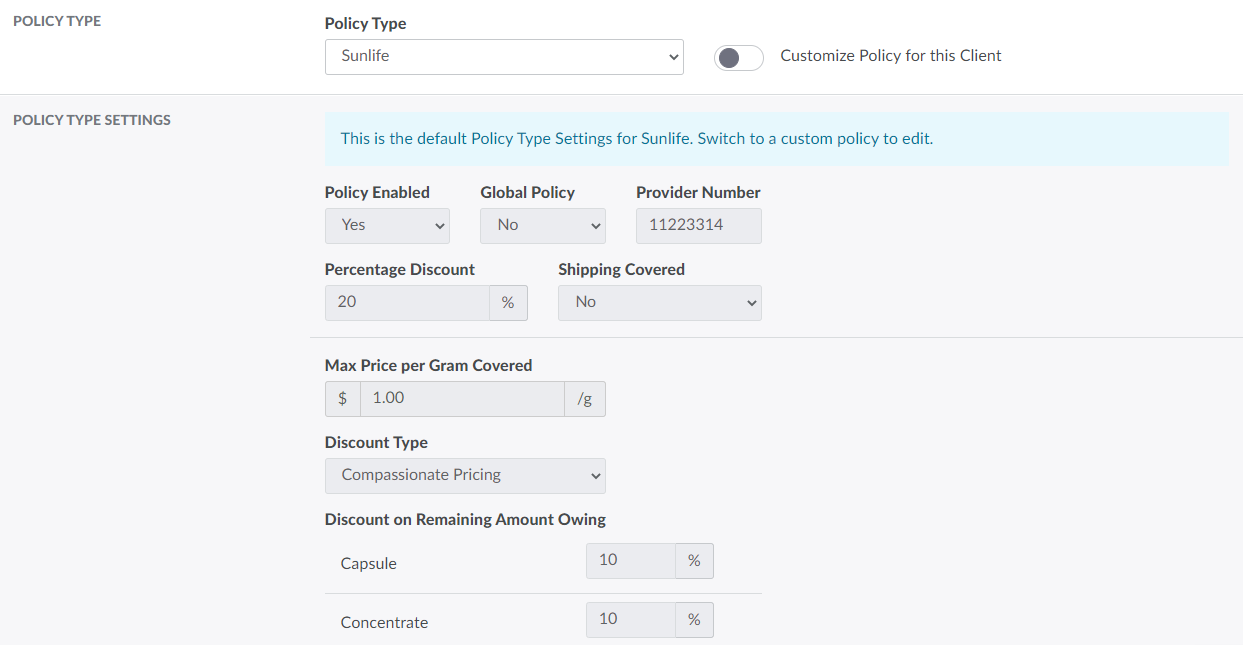
Select the policy type. This identifies the policy provider. Upon selecting a policy type, the policy type's default settings will populate in the Policy Type Settings section.
-
Note*: If the policy is through a provider that's not listed in the Policy Type drop-down menu, visit the Settings tab to Add a New Policy Type.*
-
-
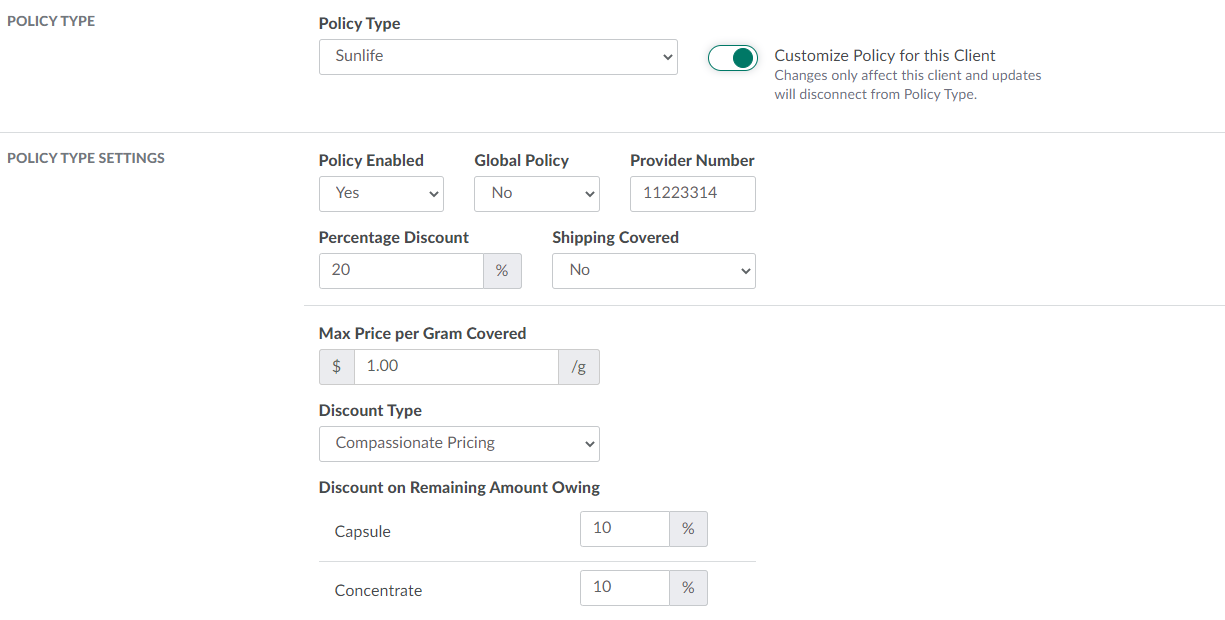
If the client's policy coverage differs from the policy type's default settings, customize the policy. Customizing a policy severs its connection to the master policy type; any **Updates**to the policy type's settings will not affect the custom policy.
-
Click the Customize Policy for this Client slider bar to mark the policy as a custom policy. This unlocks the fields in the Policy Type Settings section.
-
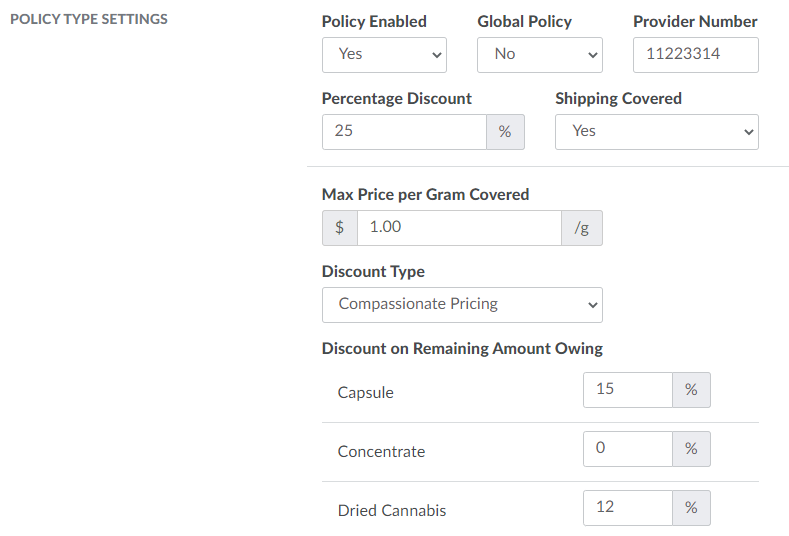
Adjust the fields in the Policy Type Settings section as necessary.
-
Policy Enabled: Indicates whether the policy is enabled.
-
Global Policy: Indicates whether or not the policy is global. Global policies cover any and all products. A non-global policy will only cover a product if the policy type is selected in the product's Policies tab.
-
Provider Number: The policy provider's ID number. Upon generating a Policy Receipt, the document will pull the provider number from this field.
-
Percentage Discount: The percentage of the order cost covered by the policy. This coverage will cap at the value entered in the Total Maximum Amount field.
-
Shipping Covered: Indicates whether or not the policy also covers shipping costs.
-
Max Price per Gram Covered: The maximum price covered per gram of cannabis.
-
Discount Type: The category of discount under which the policy falls. Discount types contribute to accurate data collection on the Policy Usage Report, Policy Type Report, and Discount Report.
- Visit the Discounts module to Add a New Discount Type.
-
Discount on Remaining Amount Owing: These fields describe the percentage of the remaining price–after policy coverage–the licence holder will cover, broken down by product type. Many licence holders offer additional coverage to clients with Veteran's Affairs Canada (VAC) policies. If the licence holder does not offer additional discounts, leave these fields at 0%.
-
-
-
Click Save to complete the new client policy.

Unless the client has a global policy, their policy coverage will only apply to products that have been marked as covered by that policy. Visit the Products module to Add Policy Coverage to a Product.
When a client Places an Order and selects their policy for co-billing, the Customer Service Representative–or CSR–must Generate a Policy Receipt before shipping the order.