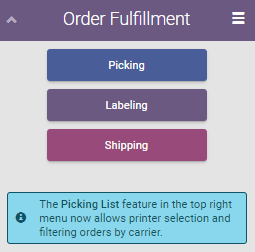
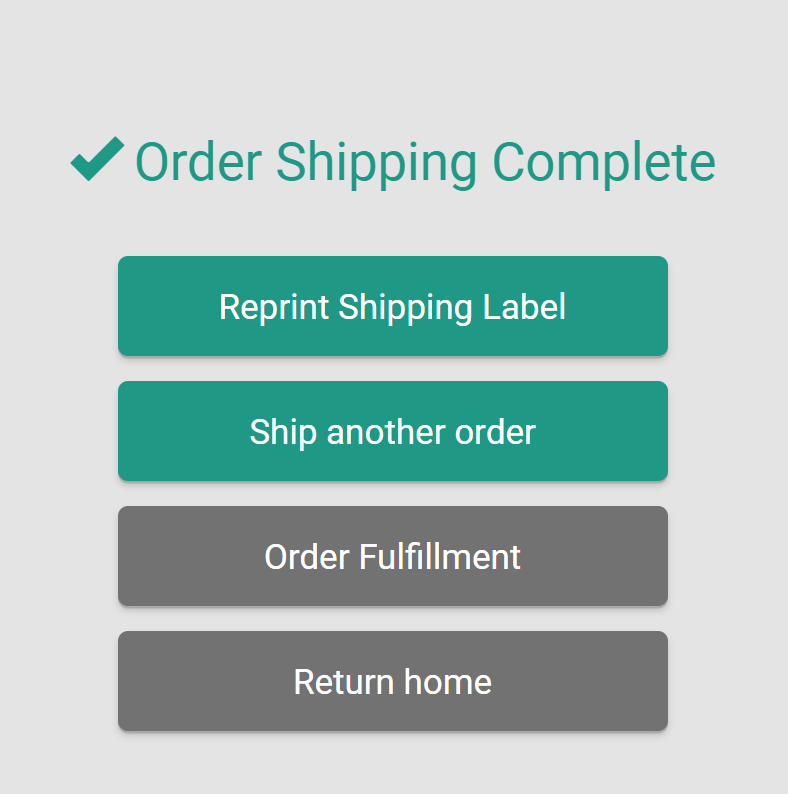
Fulfilling an order involves three distinct tasks:
-
Picking: Selecting bottles of cannabis from the inventory to fulfill the order.
-
Labeling: Printing labels for each bottle to identify it as part of a specific order for a specific client.
- Note*: While regulations no longer require bottles to have client prescription labels, order fulfillment processes continue to include labeling steps. If printed labels are not desired, contact your Account Manager to disable printing automation, and patient labels will not print.*
-
Shipping: Packaging the bottles into a shipping container and printing a shipping label.
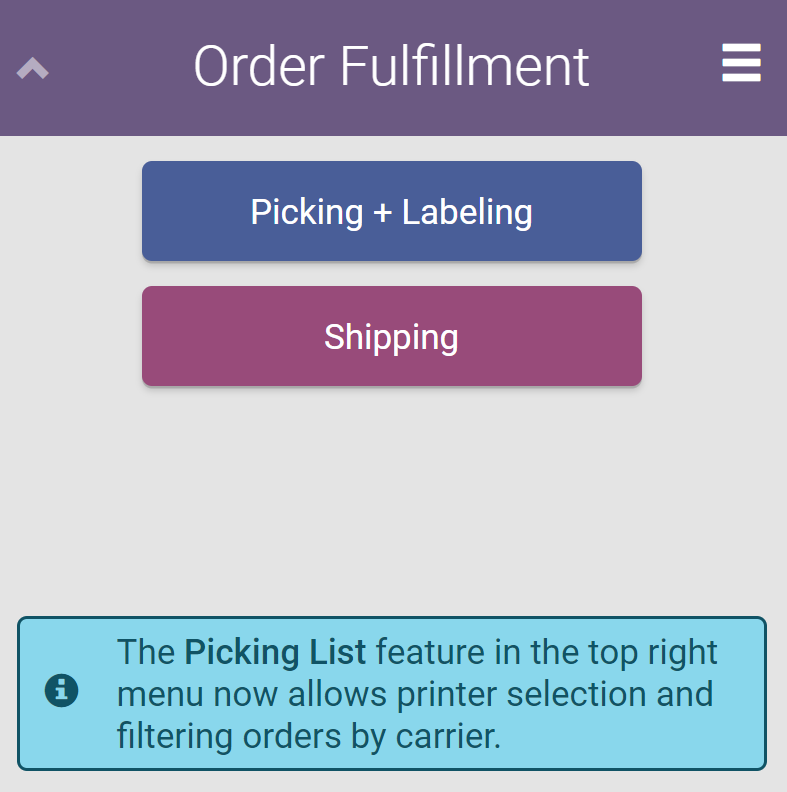
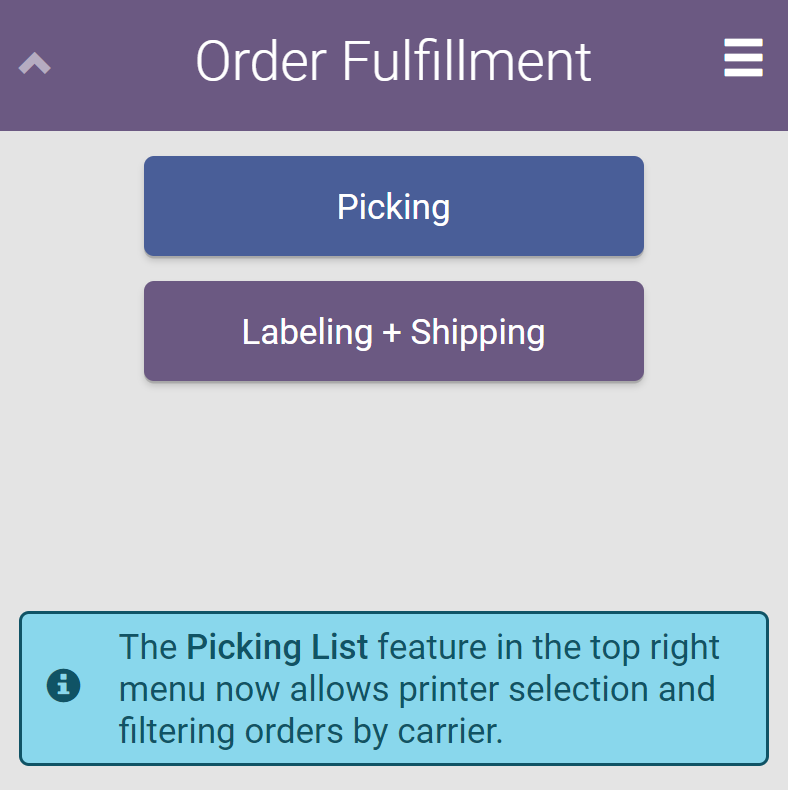
While these three tasks are essential, a Fulfillment Associate can Change the Picking Mode to customize the order fulfillment workflow to reflect the processes at their facility. Most picking modes combine 2-3 tasks into a single process, which may make sense if a single staff member fulfills multiple tasks at once.
Click one of the links below to jump to order fulfillment instructions relevant to the selected picking mode:
- Picking > Labeling > Shipping (Default)
- Picking + Labeling > Shipping
- Picking > Labeling + Shipping
- Picking + Labeling + Shipping (Process Orders)
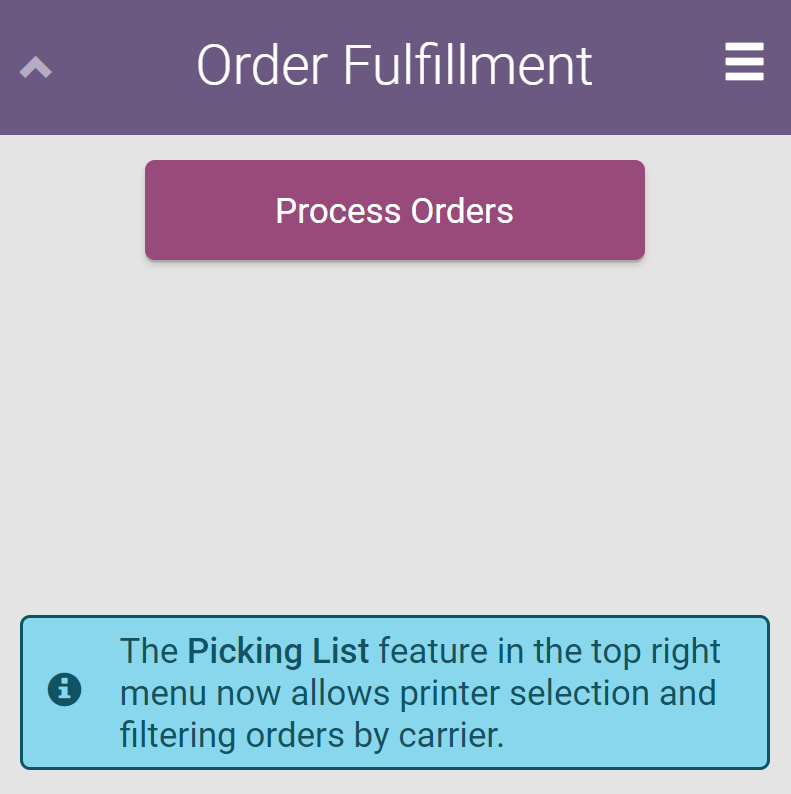
Before beginning the order fulfillment process, Print a Picking List to facilitate the process.
Picking > Labeling > Shipping (Default)
-
Log into the Gun App, and open the Order Fulfillment module.
-
Ensure the Picking > Labeling > Shipping picking mode is selected. If not, Change the Picking Mode.
-
-
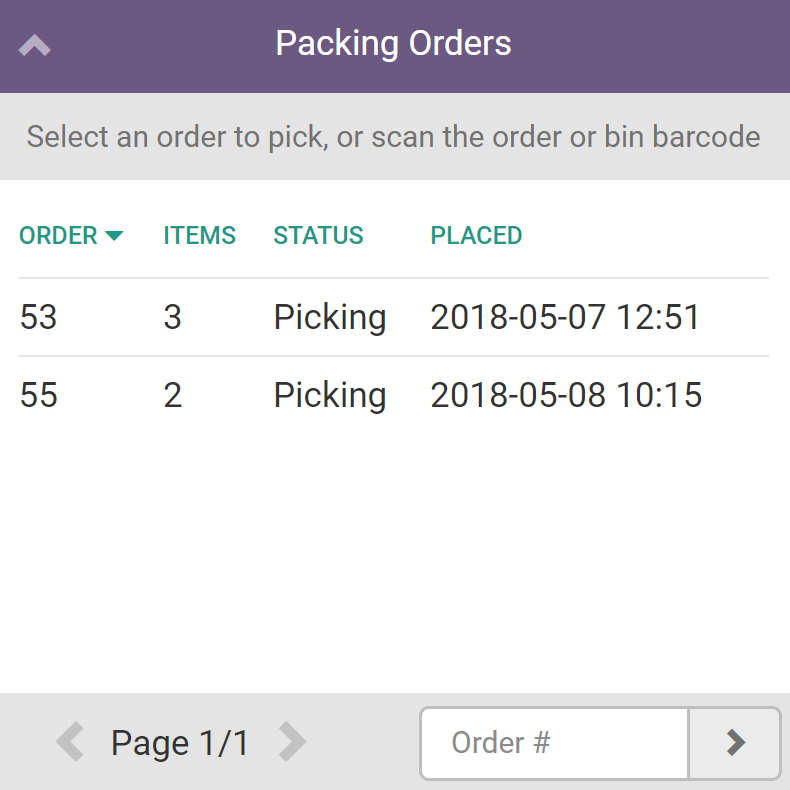
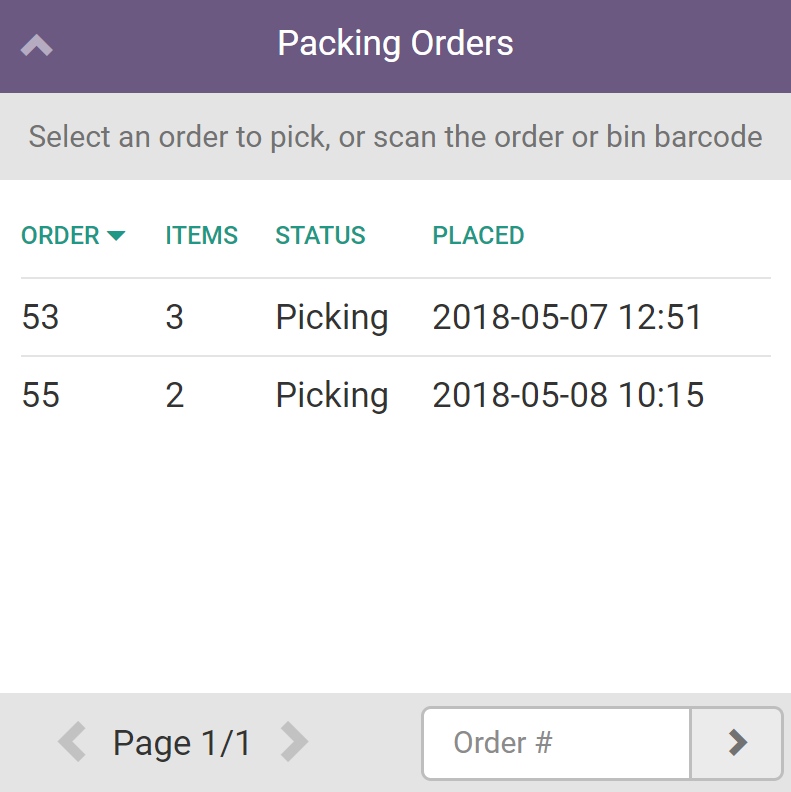
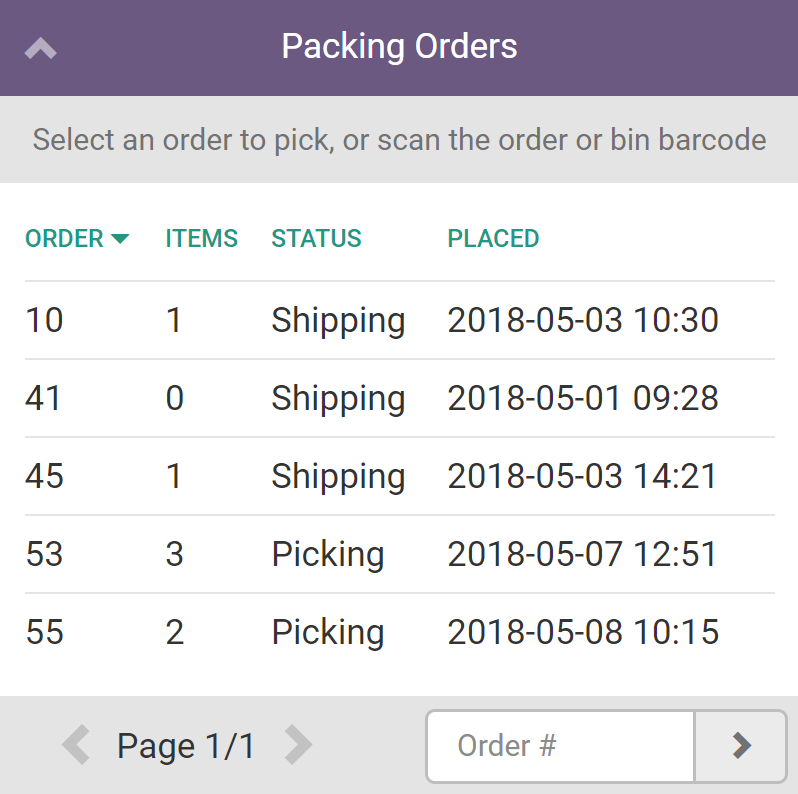
Click Picking to open a list of packing orders.
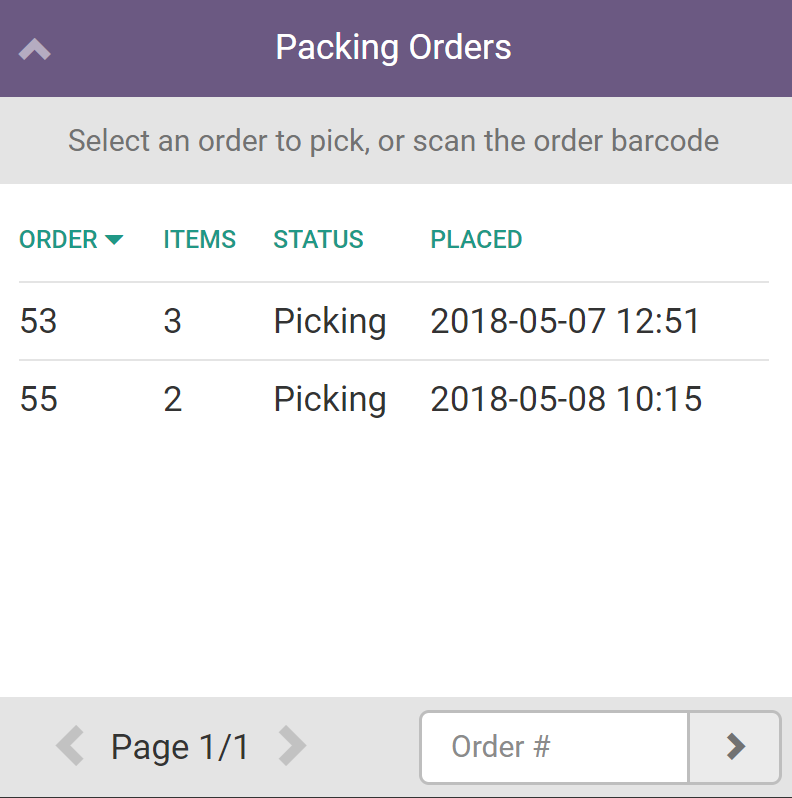
-
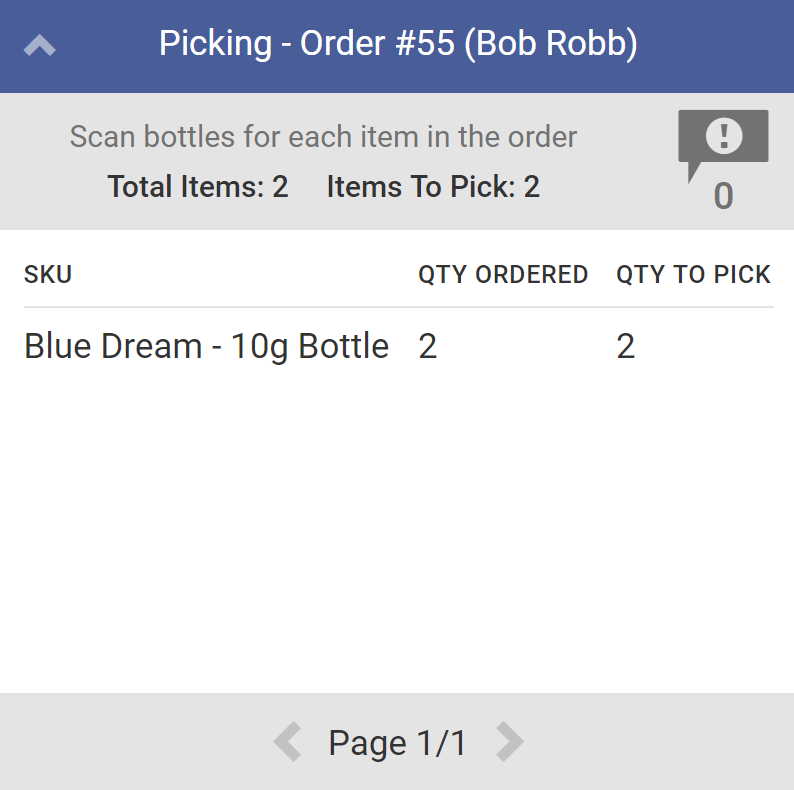
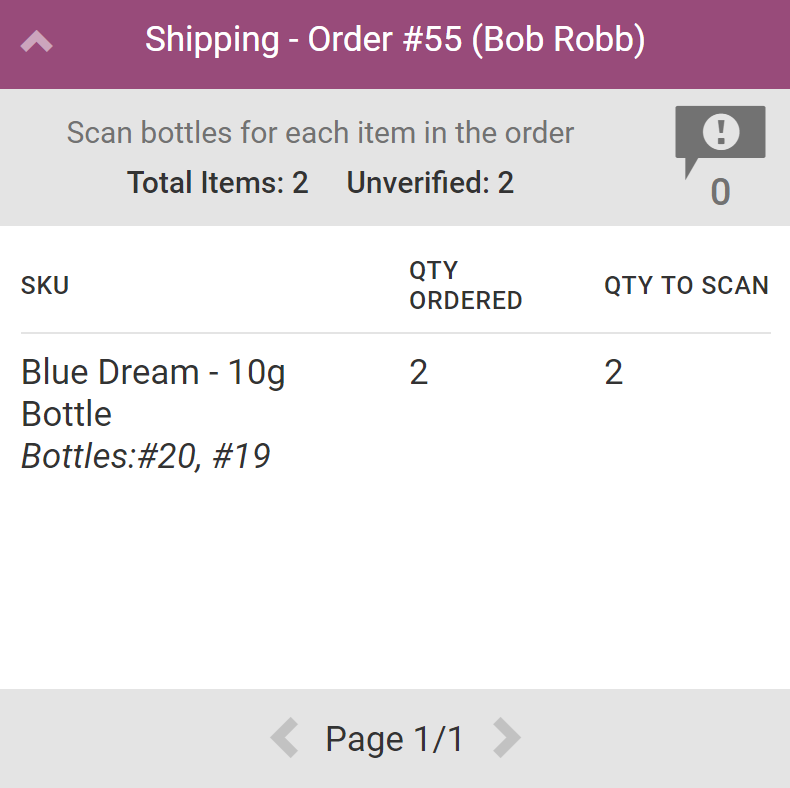
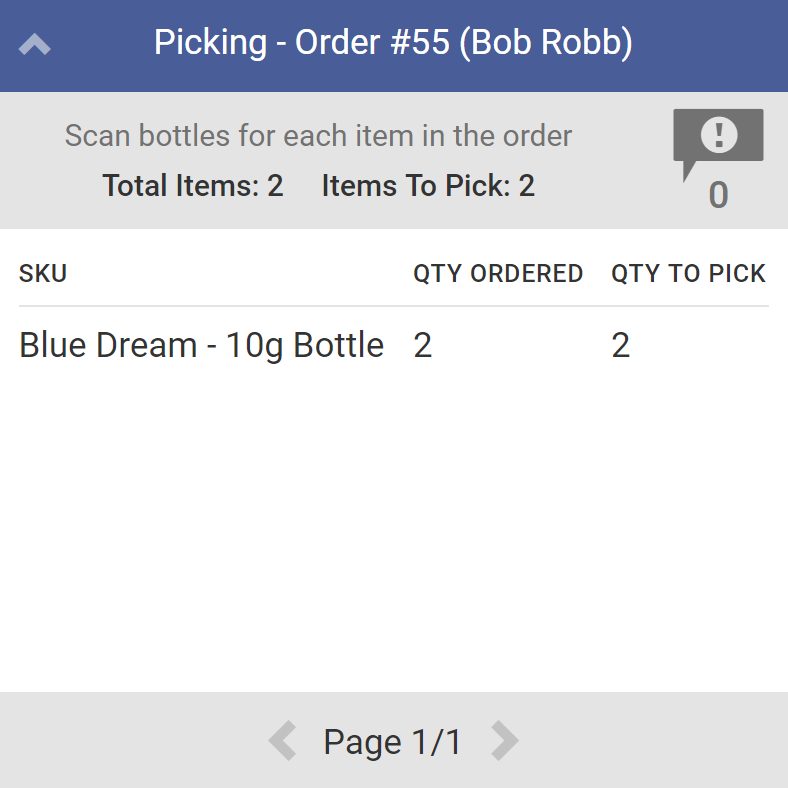
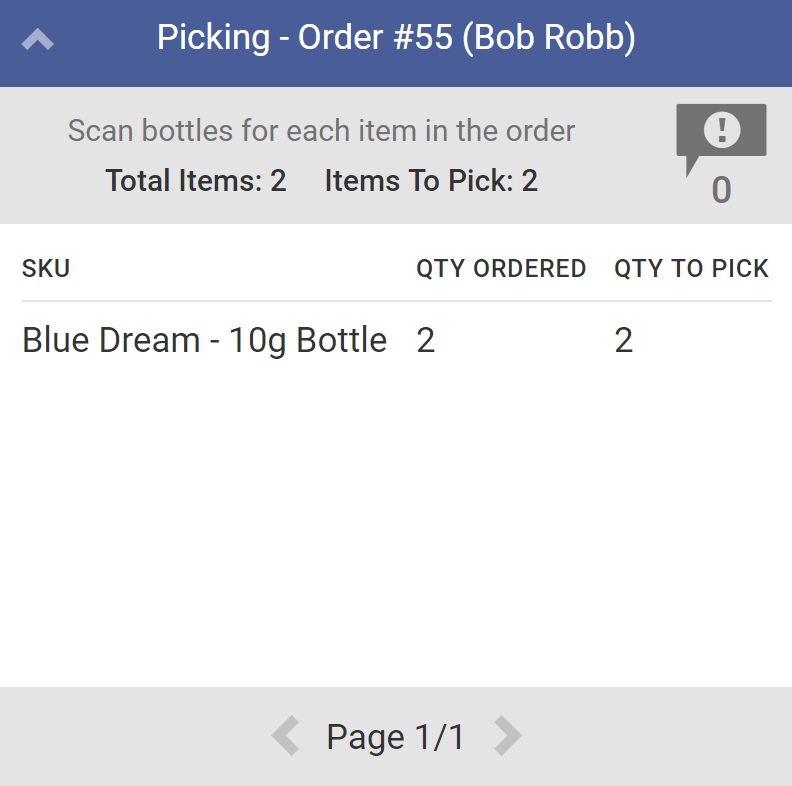
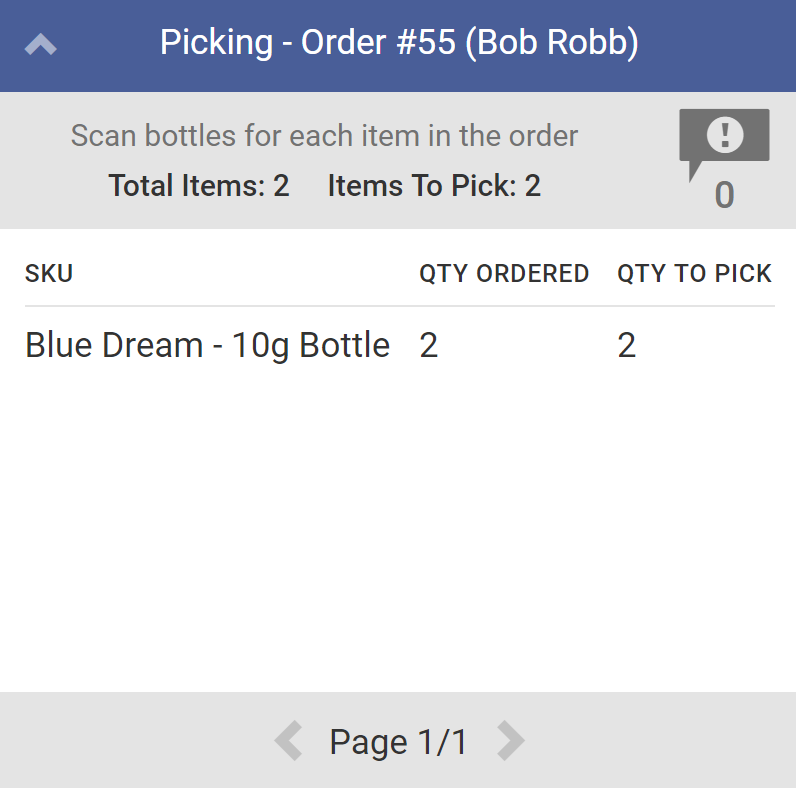
Choose an order from the list, or scan the order's barcode to select it. This opens the order's Picking summary page. The Picking summary page displays the SKUs in the order, the quantity of each SKU requested, and the quantity to be picked.
-
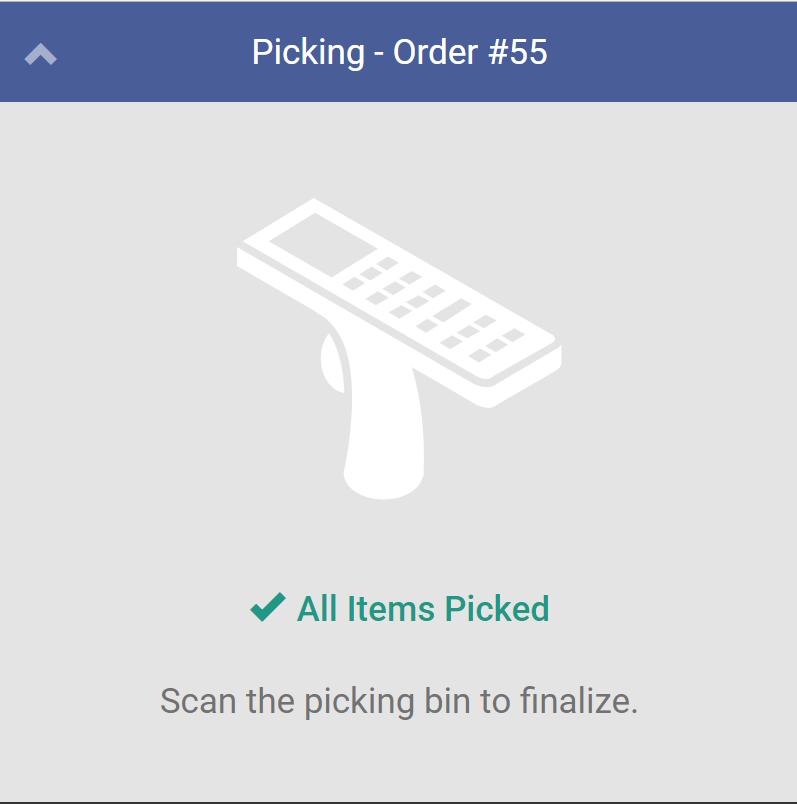
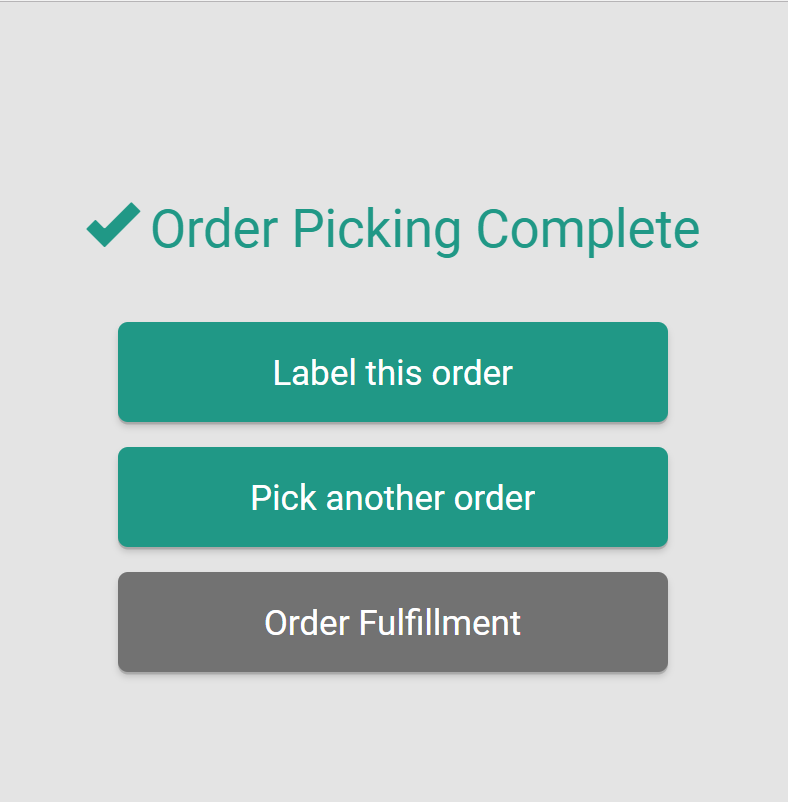
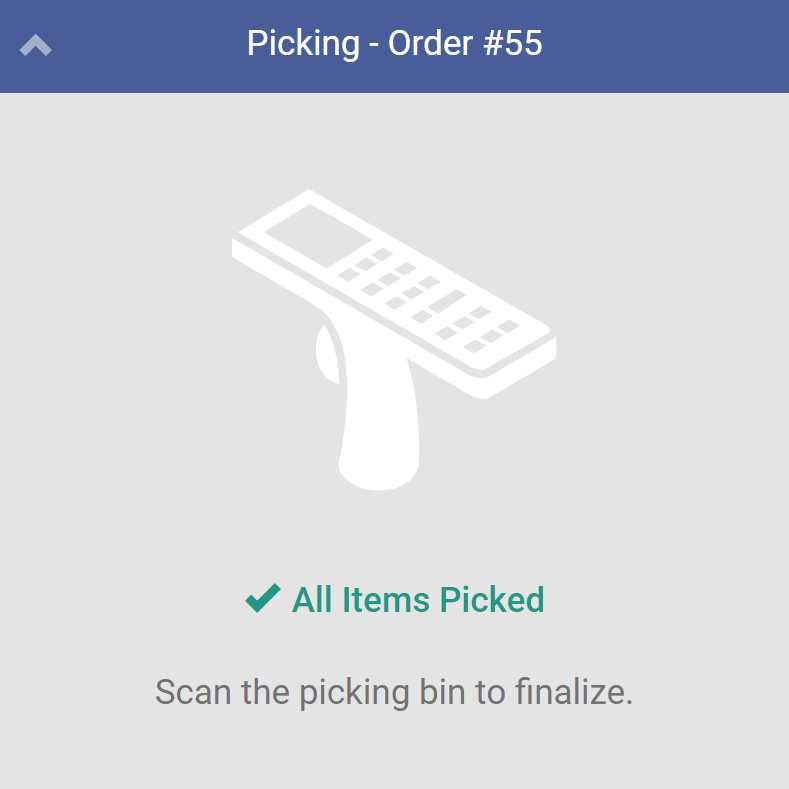
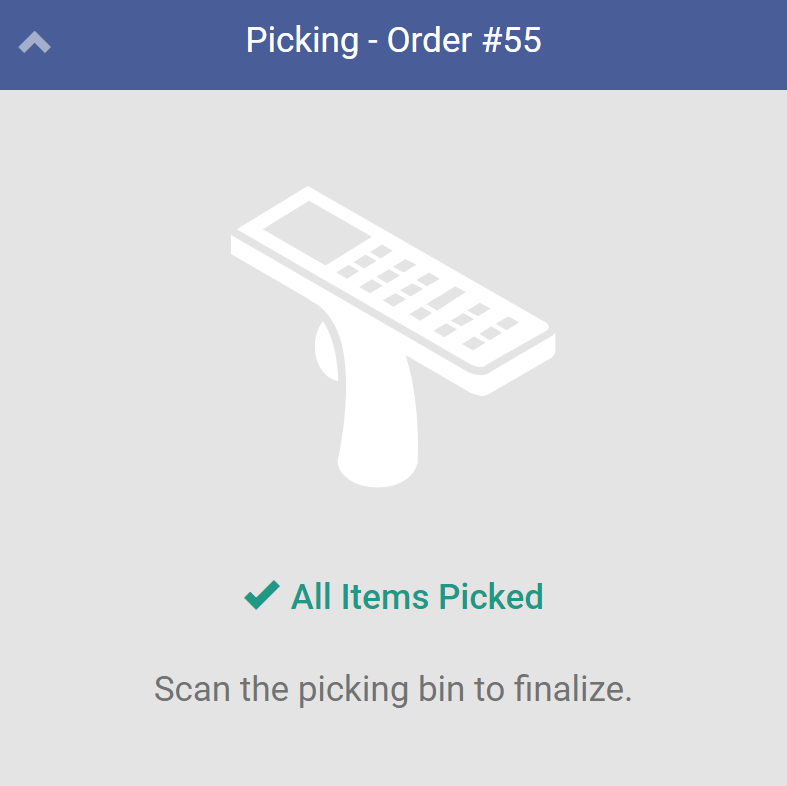
Scan a bottle of the appropriate SKU to add it to the packing order, and repeat for every item in the order. Once the Fulfillment Associate has picked all items in the order, the scanner gun will display the screen below.
-
Scan the picking bin–the container that will temporarily store the order items as they're prepared for shipping. This completes the picking process.
-
Tap Label this Order to proceed to the labeling process. This opens the order's Labeling summary page.
-
Note*: personalized labeling of bottles is optional.*

-
-
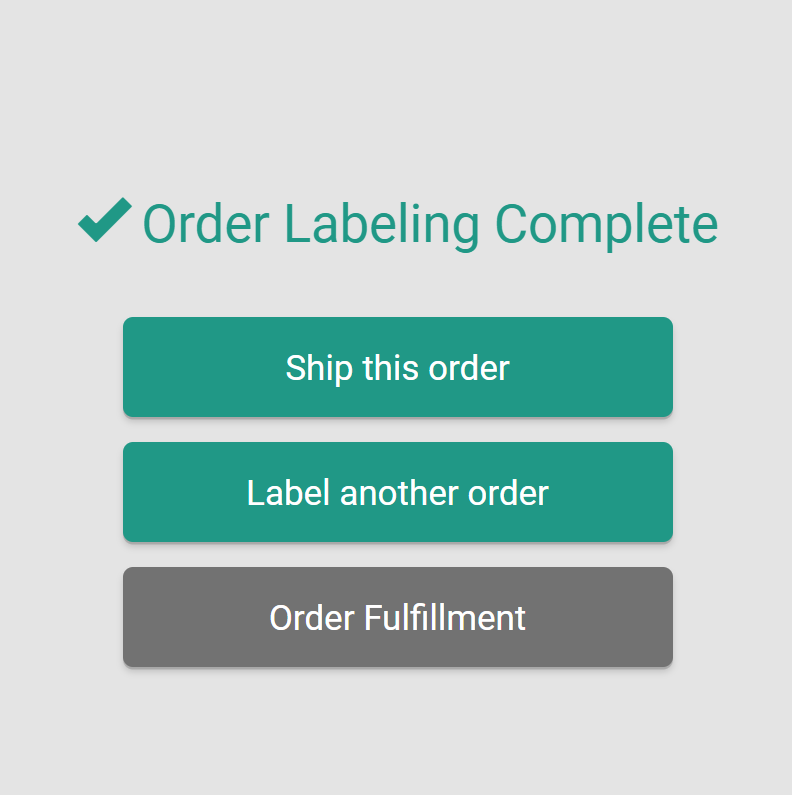
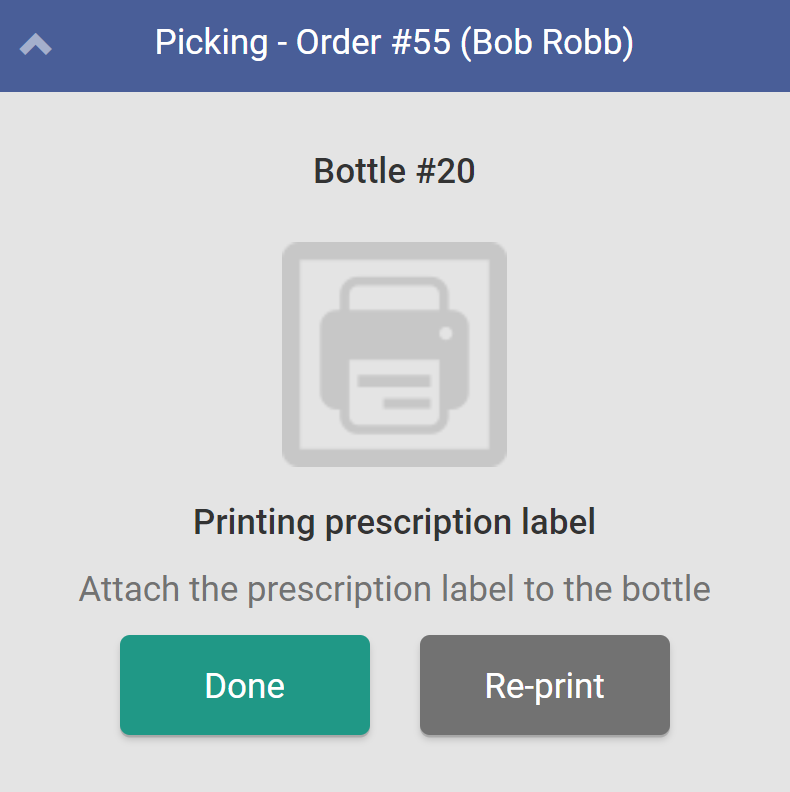
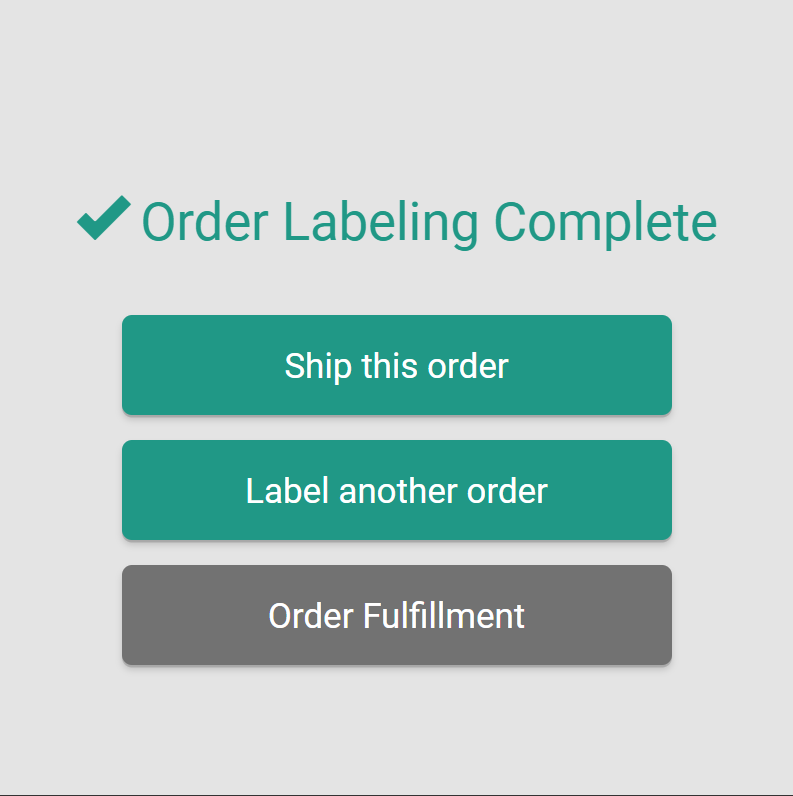
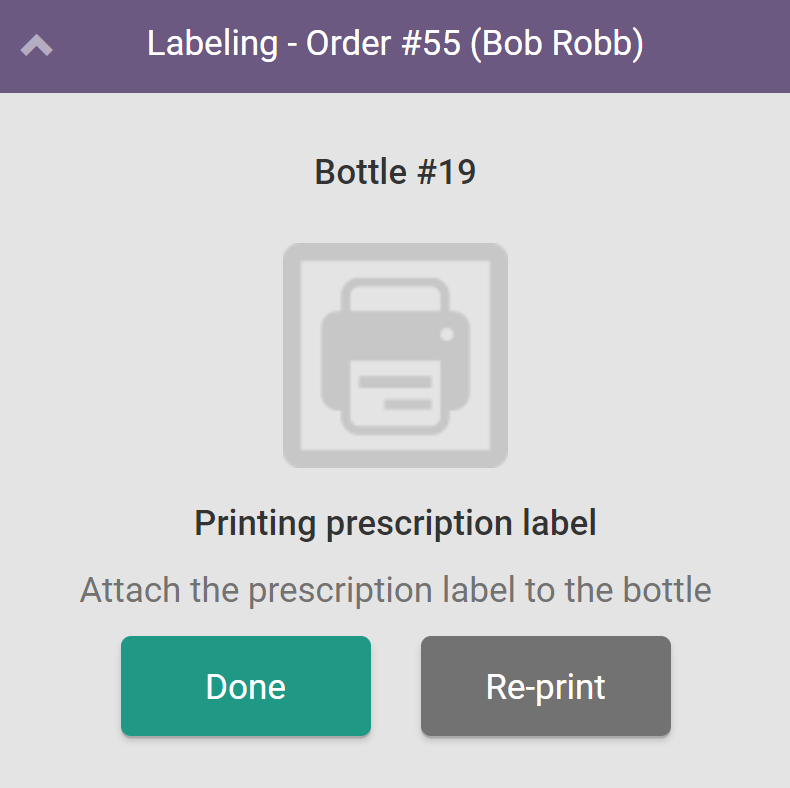
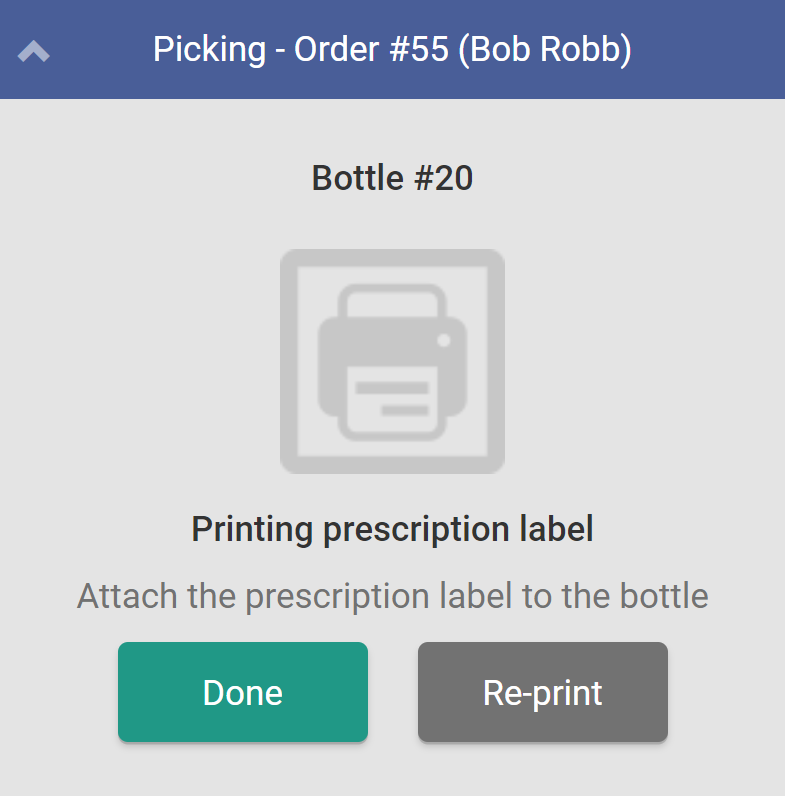
Scan a bottle to print the client's prescription label. Attach the label to the bottle and tap Done.Repeat this step until all bottles are labeled and the Scanner Gun indicates that the order labeling process is complete.

-
Tap Ship this Order to proceed with the shipping process. This opens the order's Shipping summary page.
-
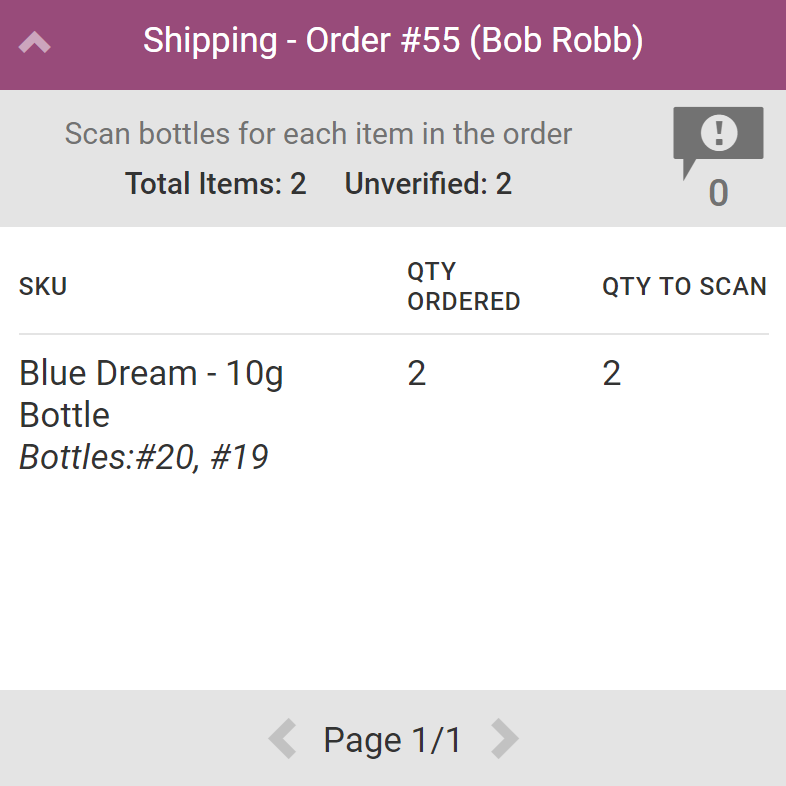
Scan a bottle before placing it in a shipping container. Repeat this step until all bottles have been scanned and loaded into the shipping container, and a printing screen appears.
-
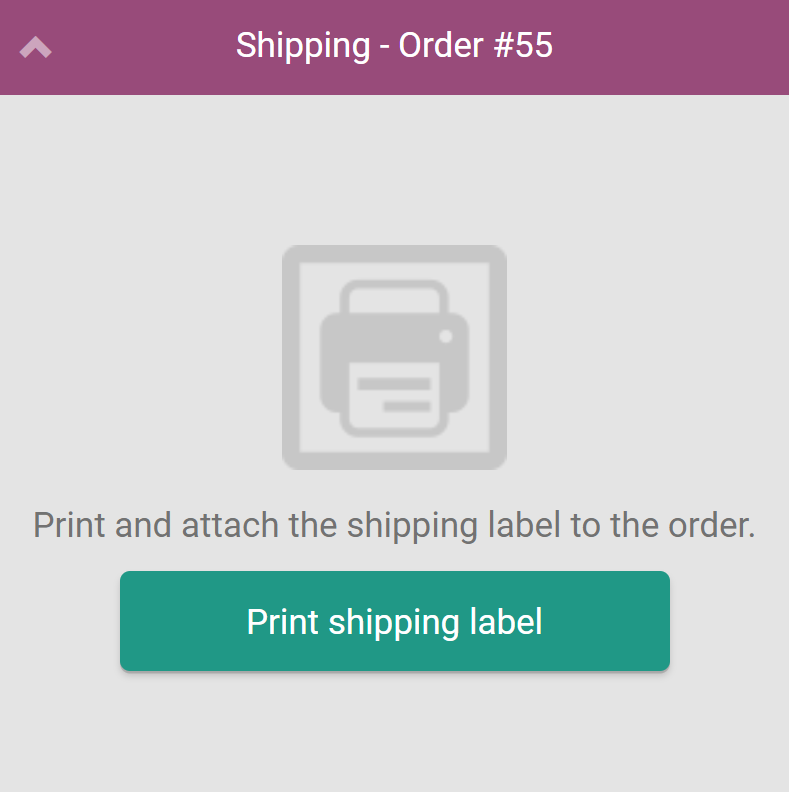
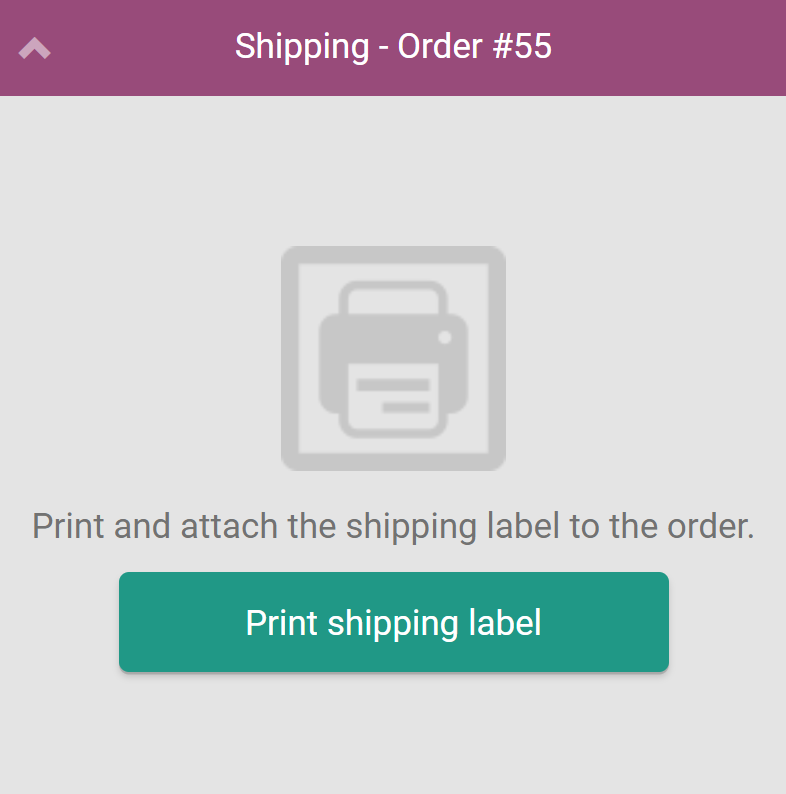
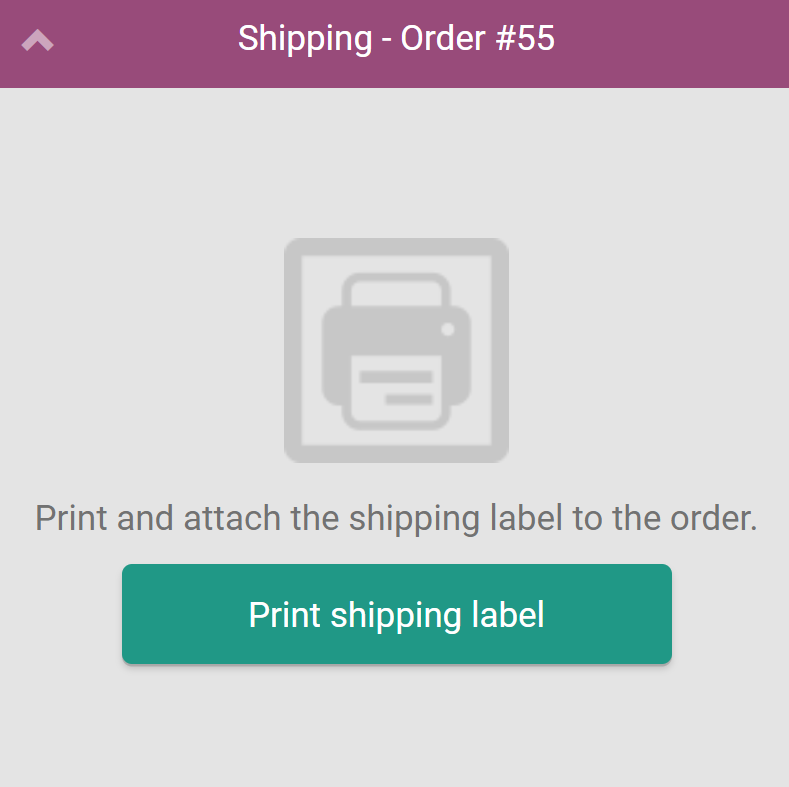
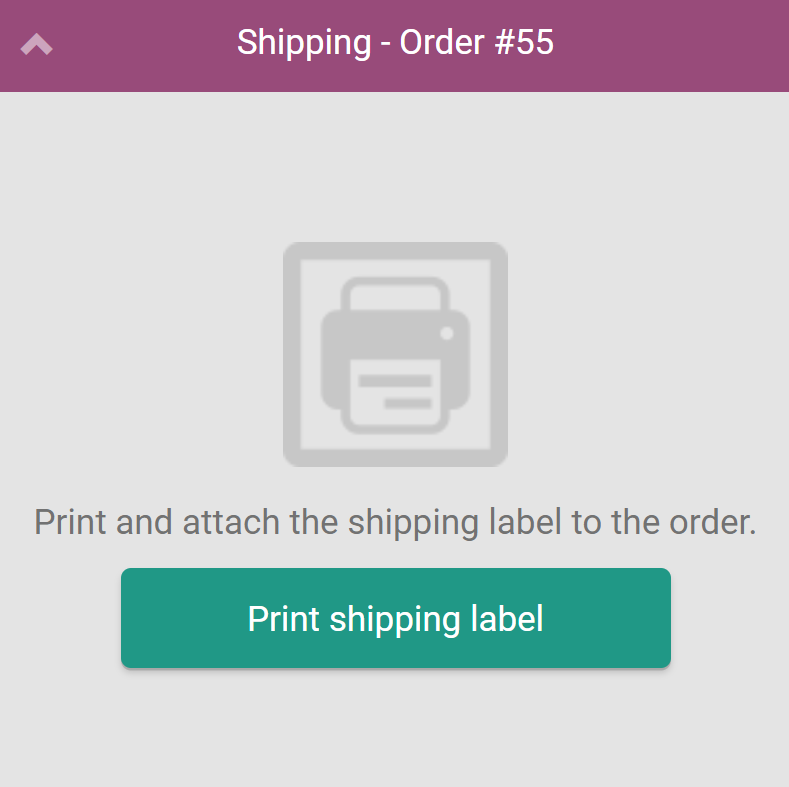
Tap Print Shipping Label to print the order's shipping label, and immediately affix it to the shipping container. This concludes the order fulfillment process, and the order is now ready for shipping.

Picking + Labeling > Shipping
-
Log into the Gun App and open the Order Fulfillment module.
-
Ensure the Picking + Labeling > Shipping picking mode is selected. If not, Change the Picking Mode.
-
-
Click Picking + Labeling to open a list of packing orders.
-
Choose an order from the list, or scan the order's barcode to select it. This opens the order's Picking summary page. The Picking summary page displays the SKUs in the order, the quantity of each SKU requested, and the quantity to pick.
-
Scan a bottle of the appropriate SKU. This adds the bottle to the order and, at the same time, prints the client's prescription label. Apply the label to the bottle and click Done.
-
Repeat step 4 for every item in the order. Once the Fulfillment Associate has picked and labeled all the order items, the Scanner Gun will display a screen indicating that all items have been picked.
-
Scan the picking bin–the container that will temporarily store the order items as they're prepared for shipping. This completes the picking and labeling process.
-
Tap Ship this Order to proceed with the shipping process. This opens the order's Shipping summary page.
-
Scan a bottle before placing it in a shipping container. Repeat this step until all bottles have been scanned loaded into the shipping container, and a printing screen appears.
-
Tap Print Shipping Label to print the order's shipping label, and immediately affix it to the shipping container. This concludes the order fulfillment process, and the order is now ready for shipping.
Picking > Labeling + Shipping (Process Orders)
-
Log into the Gun App, and open the Order Fulfillment module.
-
Ensure the Picking > Labeling + Shipping picking mode is selected. If not, Change the Picking Mode.
-
-
Click Picking to open a list of packing orders.
-
Choose an order from the list, or scan the order's barcode to select it. This opens the order's Picking summary page. The Picking summary page displays the SKUs in the order, the quantity of each SKU requested, and the quantity to pick.
-
Scan a bottle of the appropriate SKU to add it to the packing order, and repeat for every item in the order. Once the Fulfillment Associate has picked all the order items, the Scanner Gun will display the screen below.
-
Scan the picking bin–the container that will temporarily store the order items as they're prepared for shipping. This completes the picking process.
-
Tap Label this Order to proceed to the labeling and shipping process. This opens the order's Labeling summary page.

-
Scan a bottle to print the client's prescription label. Attach the label to the bottle immediately, load the bottle into the shipping container, and click Done to proceed to the next bottle.
-
Repeat step 7 until all bottles are labeled and packaged. Once the final bottle is labeled, the Scanner Gun will prompt the Fulfillment Associate to print a shipping label.
-
Click Print Shipping Label. Once the shipping label prints, immediately affix it to the shipping container. This concludes the order fulfillment process, and the order is now ready for shipping.

Picking + Labeling + Shipping
-
Log into the Gun App, and open the Order Fulfillment module.
-
Ensure the Picking + Labeling + Shipping picking mode is selected. If not, Change the Picking Mode.
-
-
Click Process Orders to open a list of packing orders.
-
Note*: This list displays orders in all stages of the order fulfillment process. This process will use order in the Picking status to demonstrate how all three stages are done at once, but the Fulfillment Associate can also select orders in the Labeling or Shipping status and proceed from that stage.*
-
-
Choose an order (in the Picking stage) from the list, or scan the order's barcode to select it. This will open the order's Picking summary page. The Picking summary page displays the SKUs in the order, the quantity of each SKU requested, and the quantity to pick.
-
Scan a bottle of the appropriate SKU. This will add the bottle to the order and, at the same time, print the client's prescription label. Apply the label to the bottle, place the bottle in the shipping container, and click Done.
-
Repeat step 4 for every item in the order. Once the final item has been scanned, labeled, and packaged, the Scanner Gun will prompt the Fulfillment Associate to print a shipping label.
-
Click Print Shipping Label. Once the shipping label prints, immediately affix it to the shipping container. This concludes the order fulfillment process, and the order is now ready for shipping.
Visit the **Shipping**module to Create and Modify Shipment Batches.