Rather than cultivating cannabis plants to harvest and process into saleable products, some license holders may purchase packaged inventory from another source to sell to their clients. You can use this feature to receive packaged items or Bulk Inventory.
Required permission(s): product_read, production_read, bulk_lot_create, received_inventory_read, received_inventory_create
-
In the Wholesale application, open the Received Inventory tab. The Packaged sub-tab will be open by default.
[img received-inventory-index-packaged] -
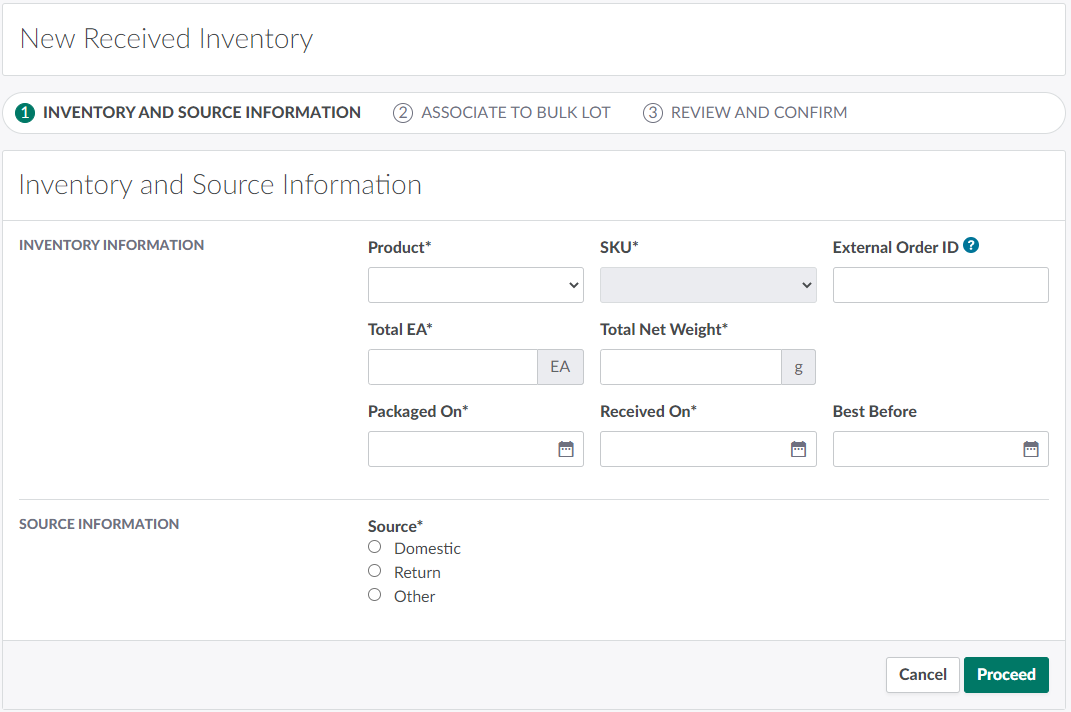
Click New. This opens the New Received Inventory page on Step 1: Inventory And Source Information.
-
Record details about the Received Inventory in the Inventory Information section.
-
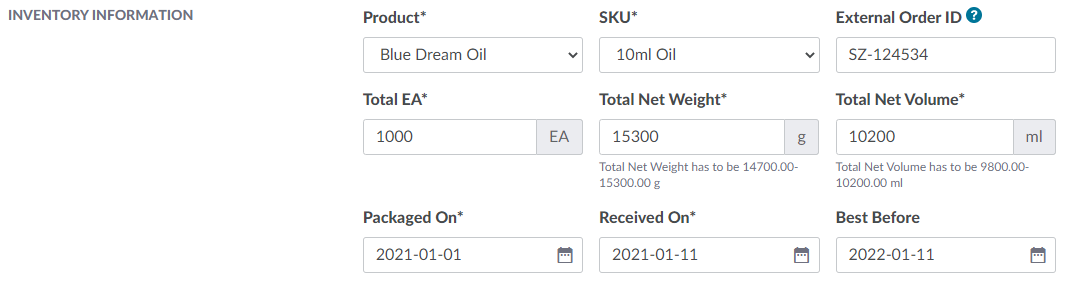
Product: Select the product received.
- If the license holder is receiving inventory for a product that is not yet configured, visit the Products module to Add a New Product.
-
SKU: Select the SKU received.
- If the license holder is receiving units of a SKU that is not yet configured, visit the Products module to Create a New SKU.
-
External Order ID: The external order's unique ID number. Assigning an external order ID helps users keep track of Received Inventories from the same order. This is an optional field.
-
Total EA: The total number of EA units–also known as "each" units or bottles–received.
-
Total Net Weight: The total net weight of cannabis across all EA units in the Received Inventory. Help text appears beneath this field to describe the acceptable weight range based on the SKU's Net Weight multiplied by the value in the Total EA field.
-
Total Net Volume: The total net volume of cannabis across all EA units in the Received Inventory. This field only appears if you select an Extracts SKU. Help text appears beneath this field to describe the acceptable weight range based on the SKU's Net Volume multiplied by the value in the Total EA field.
-
Packaged On: The date on which the inventory was packaged.
-
Received On: The date on which the license holder received the inventory.
-
Best Before: The inventory's expiry date.
-
-
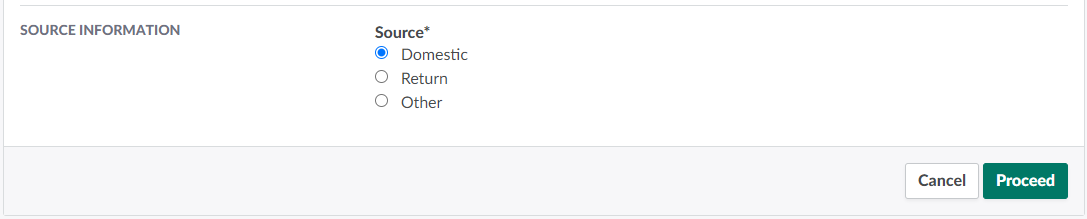
Indicate the Received Inventory's origin in the Source Information section. Options are:
-
Domestic: Inventory received from another domestic cannabis producer.
-
Return: Inventory returned from a previous sale.
-
Other: Inventory received by other means.
-
-
Click Proceed to advance to Step 2: Associate To Bulk Lot.
-
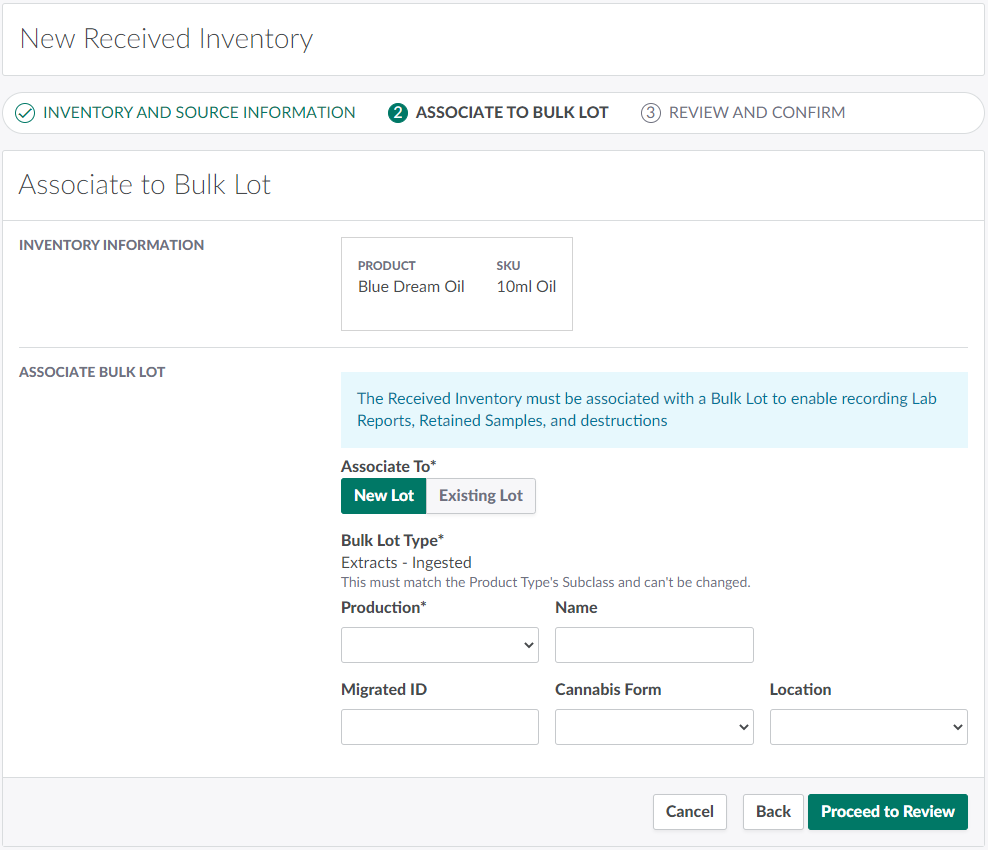
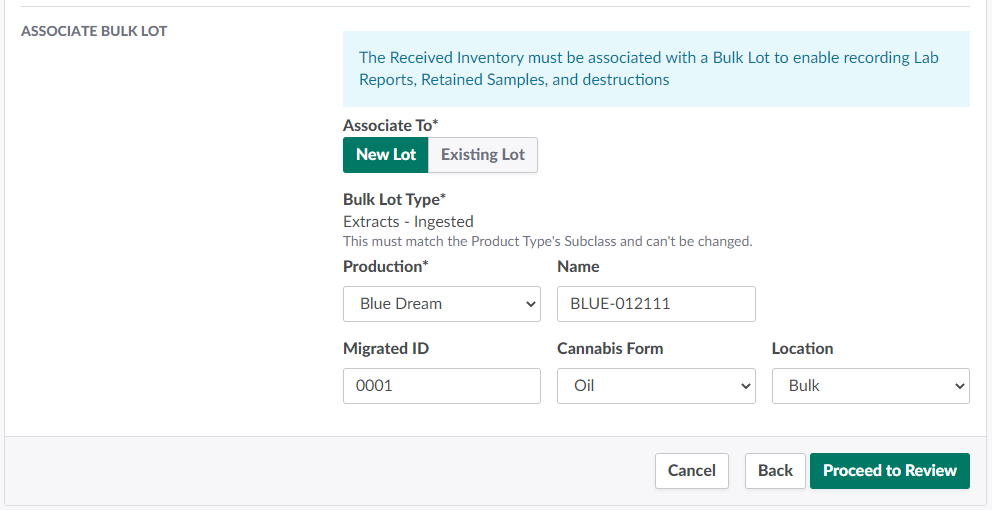
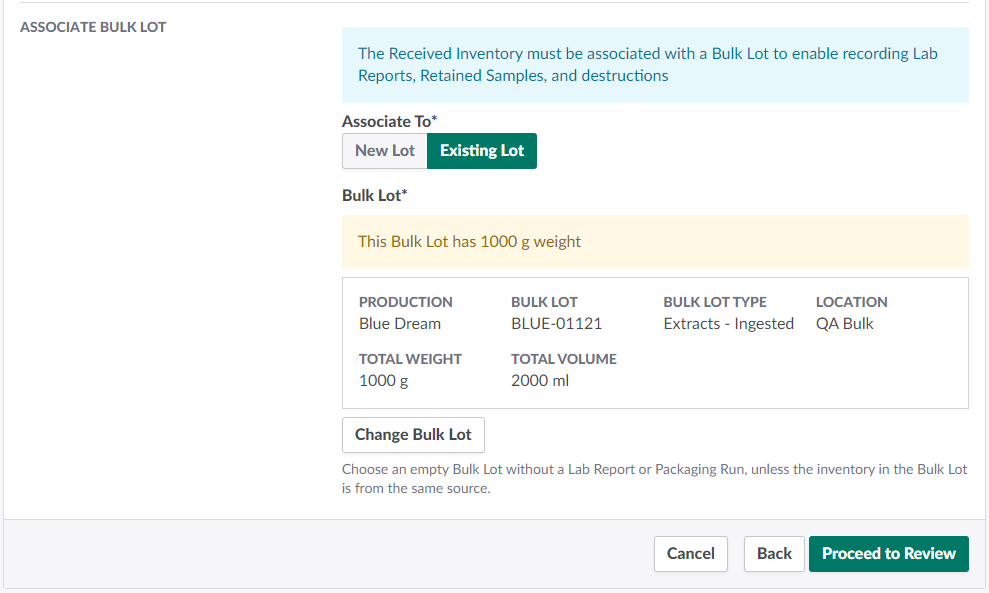
Associate the Received Inventory to a Bulk Lot. This may be a new Bulk Lot or an existing Bulk Lot of the appropriate type.
-
To create a New Bulk Lot:
-
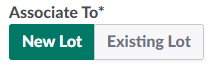
Under Associate To, select New Lot. It should be selected by default.
-
Configure information about the new Bulk Lot in the fields provided.
-
Bulk Lot Type: The new Bulk Lot type will match the selected product's type subclass. This field cannot be adjusted.
-
Production: The new Bulk Lot's parent production.
-
Name: The new Bulk Lot's name.
-
Migrated ID: The Bulk Lot's ID number as it appears in the sender's management system. This is an optional field.
-
Cannabis Form: The Bulk Lot's cannabis form. For reporting accuracy, select a cannabis form that describes the quality of cannabis in the EA units.
- If necessary, visit the Productions module to Add a New Cannabis Form.
-
Location: The Bulk Lot's location.
-
-
-
To select an existing Bulk Lot:
-
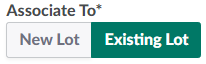
Under Associate To, select Existing Lot.
-
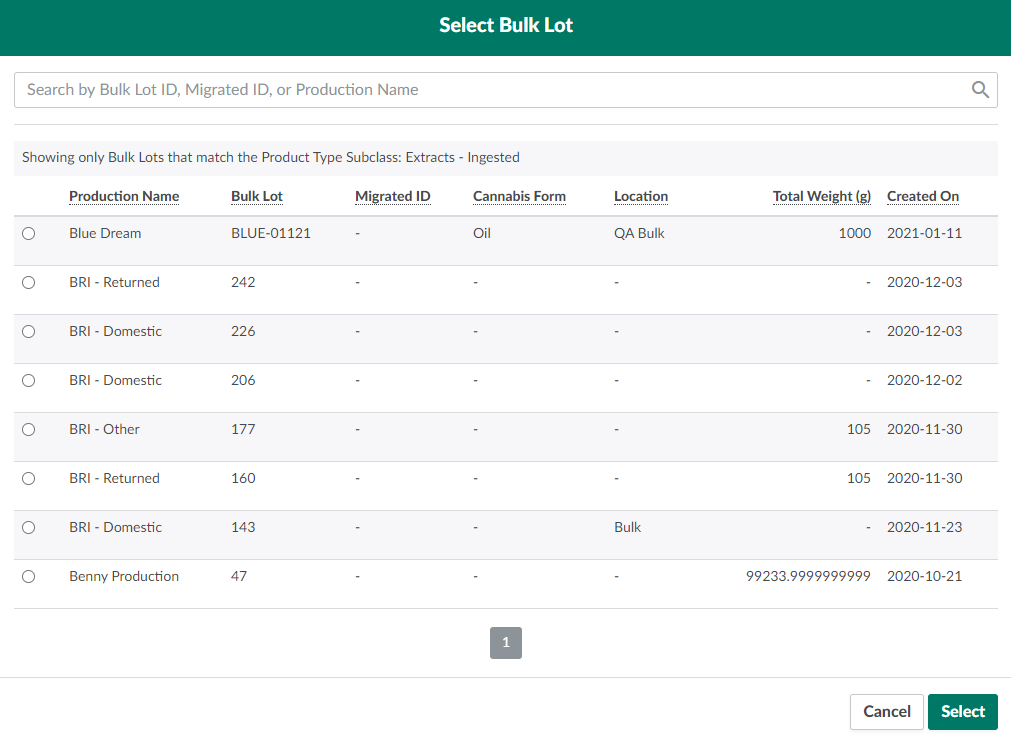
Click Select Bulk Lot to open a menu of Bulk Lots of the appropriate Bulk Lot type for the selected product's type subclass.
-
Select a Bulk Lot by checking its box in the leftmost column.
- Note*: Choose an empty Bulk Lot without a Lab Report or Packaging Run, unless the inventory in the Bulk Lot is from the same source as the new Received Inventory.*
-
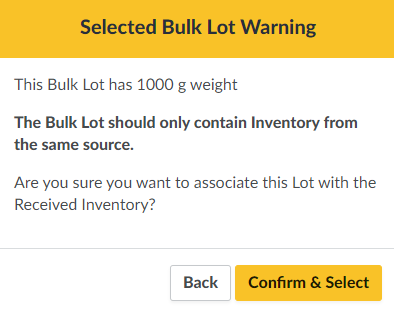
Click Select. If the Bulk Lot already contains weight, a warning modal will appear. As a best practice, each Bulk Lot should contain only inventory from the same source.
-
Click Confirm & Select to close the modal.
- Note*: If an error occurs, click Change Bulk Lot to select a different Bulk Lot.*
-
-
-
Click Proceed to Review to advance to Step 3: Review And Confirm.
-
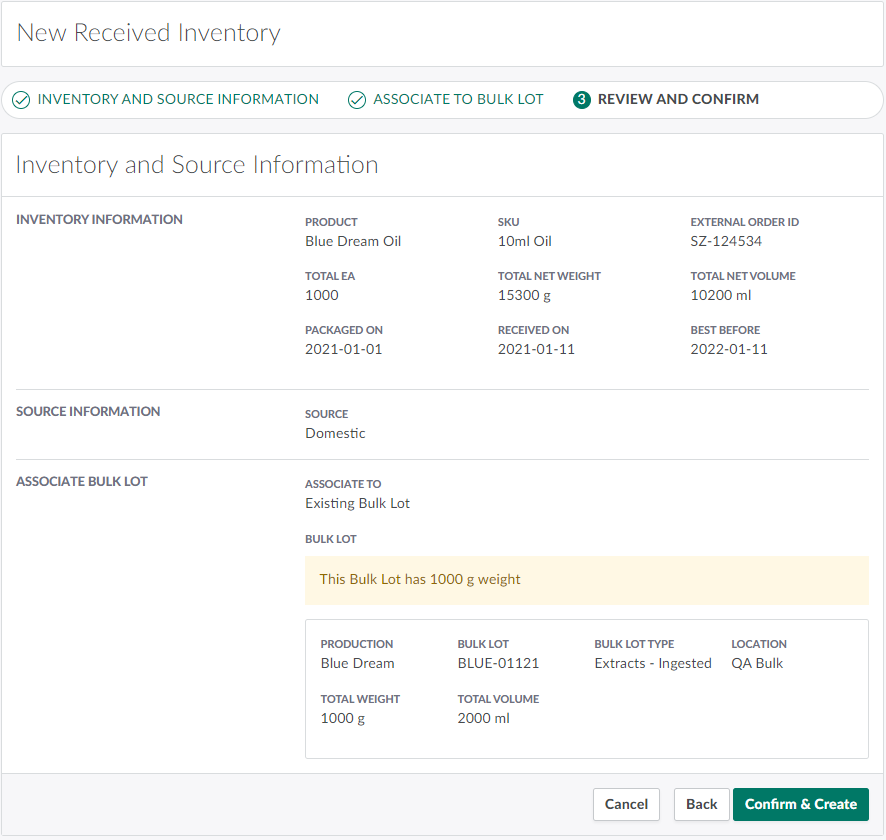
Review the inventory, source, and Bulk Lot information. If everything is in order, click Confirm & Create. This creates the new Received Inventory and associates the received units to the relevant product, SKU, and Bulk Lot.

Before the Received Inventory can be Released for Sale, the associated Bulk Lot must have an active lab report and be QA Approved. This may require the license holder to Send a Sample to an external lab for testing.
From the Received Inventory tab, you can also Return Received Inventory. If you entered the Received Inventory's information in error, you can Revert the Received Inventory to correct the mistake.