Entering lab report data is an essential step in releasing a Bulk Lot, as for many product types, a SKU's publicly-visible potency information is pulled directly from the associated Bulk Lot's active lab report. For other product types, a SKU's publicly-visible potency information is based on defaults configured in the SKU's Profile, but a product manager will still use the lab report as a reference when setting up those fields.
After Creating a Lab Report, a QA Technician should send a sample to an external lab for testing. Once the test results come back, the technician must return to the Bulk Lot's Lab Reports tab to update the lab report with the external lab's Certificate of Analysis–or COA–results.
Required permission(s): production_read, lab_report_update
-
In the Productions module, select a production.
-
Select a Bulk Lot. This opens the Bulk Lot's Profile.
-
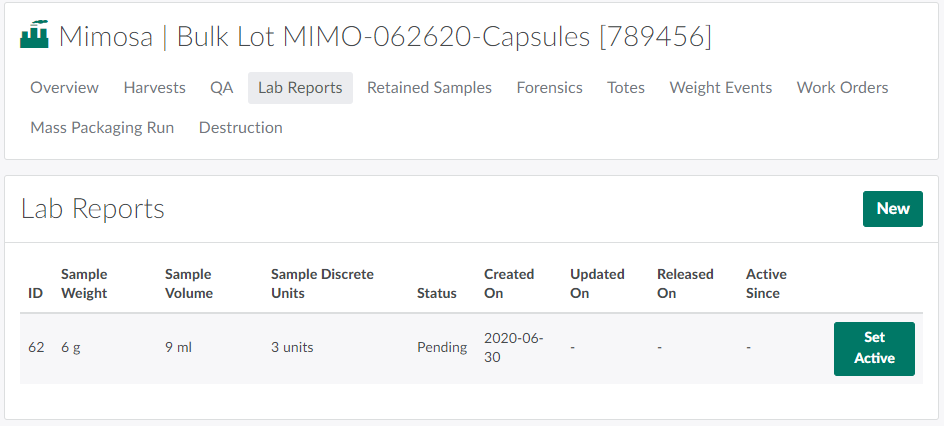
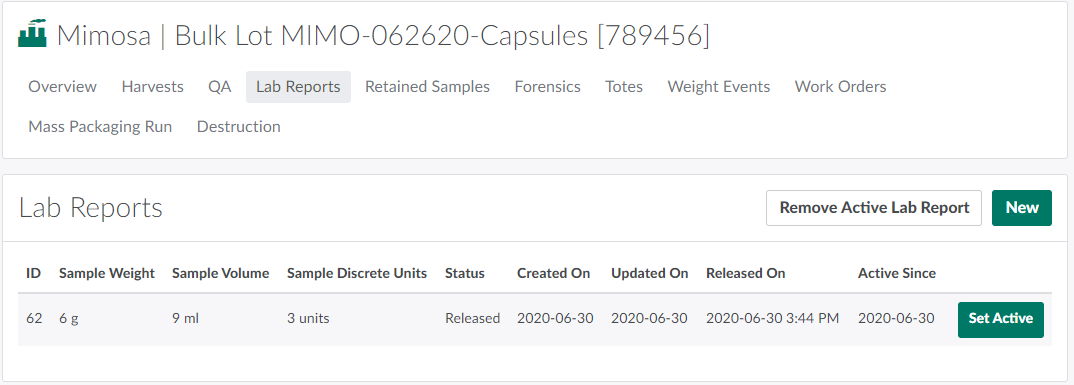
Open the Lab Reports tab.
-
Select the appropriate lab report. This opens the Lab Report's page.

-
Transfer data from the COA document to the fields provided.
-
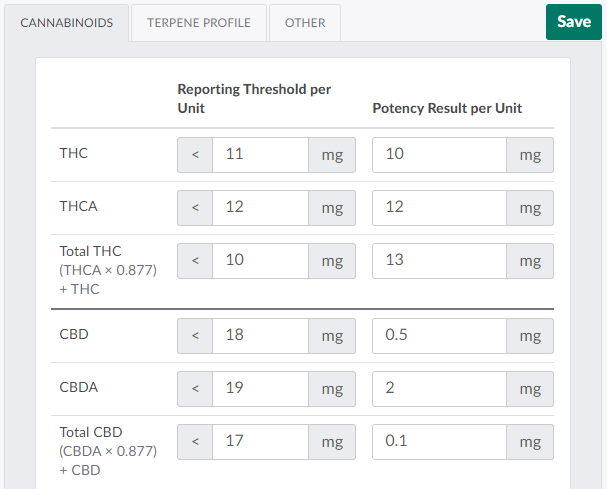
In the Cannabinoids sub-tab, enter reporting thresholds for each cannabinoid. A reporting threshold is an expected value, and affects how potency information displays on public-facing labels. For example, if the reporting threshold is 5 mg/g and the actual potency result is 4 mg/g, the label will read <5 mg/g.
-
Note*: To use the default values configured in the Lab Report Threshold Defaults tab, click Reset to Defaults.*

-
-
Enter the sample's cannabinoid potencies results. Before a QA Technician can release a lab report, the THC, Total THC, CBD, and Total CBD fields must be filled in.

-
Enter the sample's terpene profile in the Terpene Profile sub-tab.
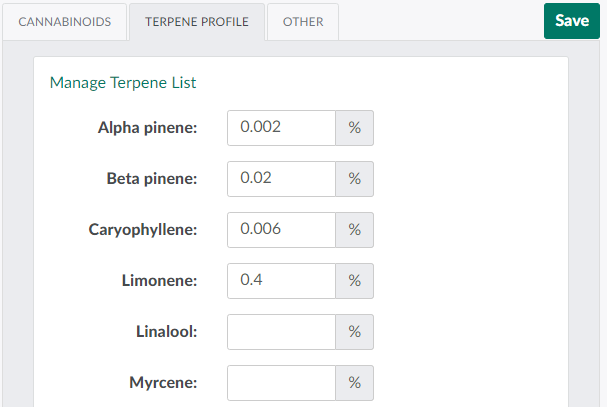
- If the lab returns results for a terpene that does not appear here, click Manage Terpene List to Add a New Terpene.
-
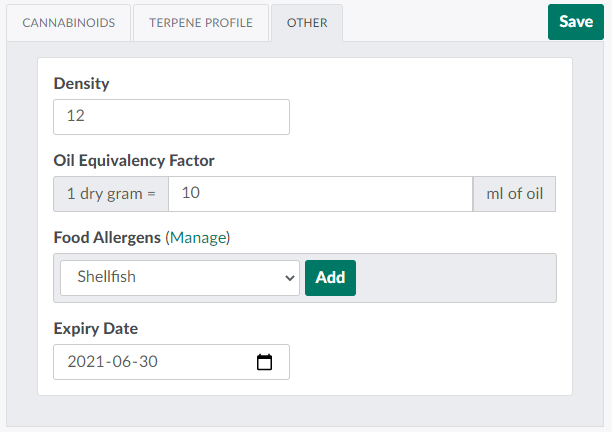
Enter additional information, in the Other sub-tab. Depending on the Bulk Lot's type, this may include:
-
The sample's Fresh Marihuana Equivalency Factor. This only appears if the Bulk Lot is Dried.
-
The sample's Oil Equivalency Factor. This only appears if the Bulk Lot is an Extract, Topical, or Edible.
-
The sample's Density. This only appears if the Bulk Lot is an Extract, Topical, or Edible.
-
Any food allergens discovered in the sample.
- Click Manage to Add a New Food Allergen.
-
The Bulk Lot's expiry date.
-
-
-
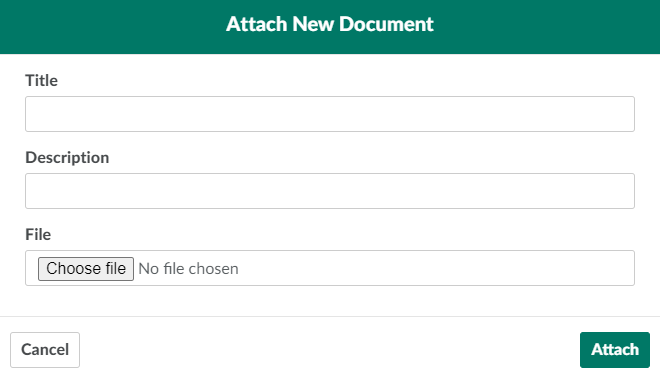
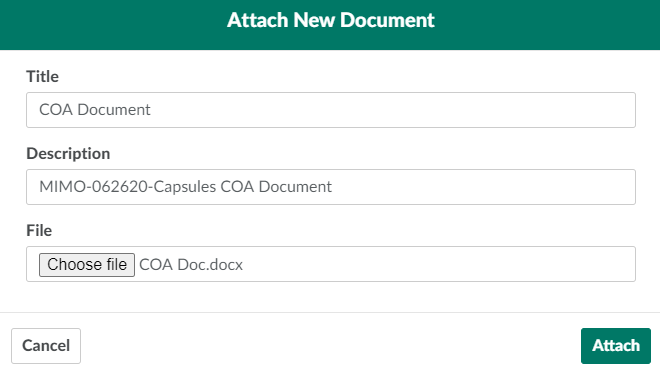
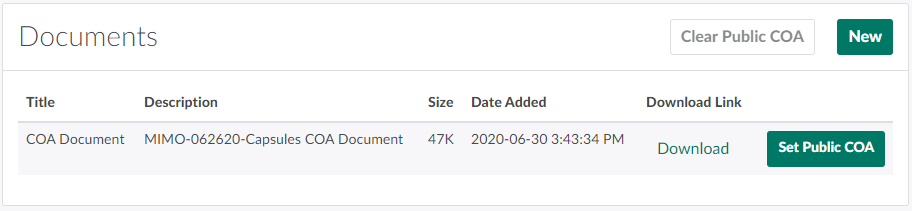
If desired, attach a publicly visible copy of the COA report.
-
Scroll down to the Documents section, and click New.This opens an Attach New Document modal.
-
Upload the COA file, and enter a title and description in the fields provided.
-
Click Attach to upload the document.
-
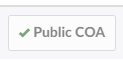
Click Set Public COA to identify the document as the public Certificate of Analysis.
-
-
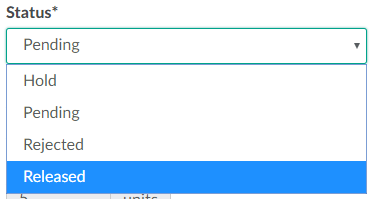
Open the Status drop-down menu, and set the lab report's status to Released.
-
Click Save to update the lab report.

-
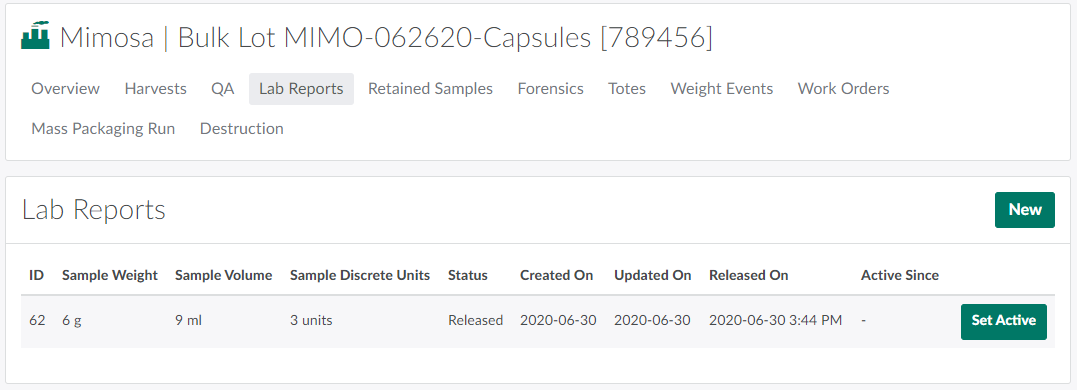
Return to the Lab Reports tab.
-
Click Set Active to mark the lab report as Active.
Once the Bulk Lot has an active lab report, Release the Bulk Lot. This ensures that any units packaged from the Bulk Lot can be released for public sale.