In response to a vendor's purchase order–or PO–requesting a wholesale order, a license holder will create a Sales Order to accept the request and confirm their end of the transaction. This process includes selecting the appropriate currency and configuring a tax type for the order or by line item.
A Sales Order may include packaged items or Bulk, Unpackaged Items.
Required permission(s): sales_order_read, sales_order_create, tax_types_read
-
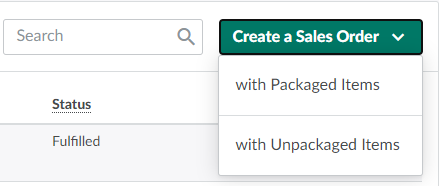
In the Wholesale application, open the Sales Orders tab. It should be open by default.
[img sales-order-index] -
Open the Create a Sales Order drop-down menu.
-
Select with Packaged Items. This opens a New Sales Order on Step 1: Basic Information.
-
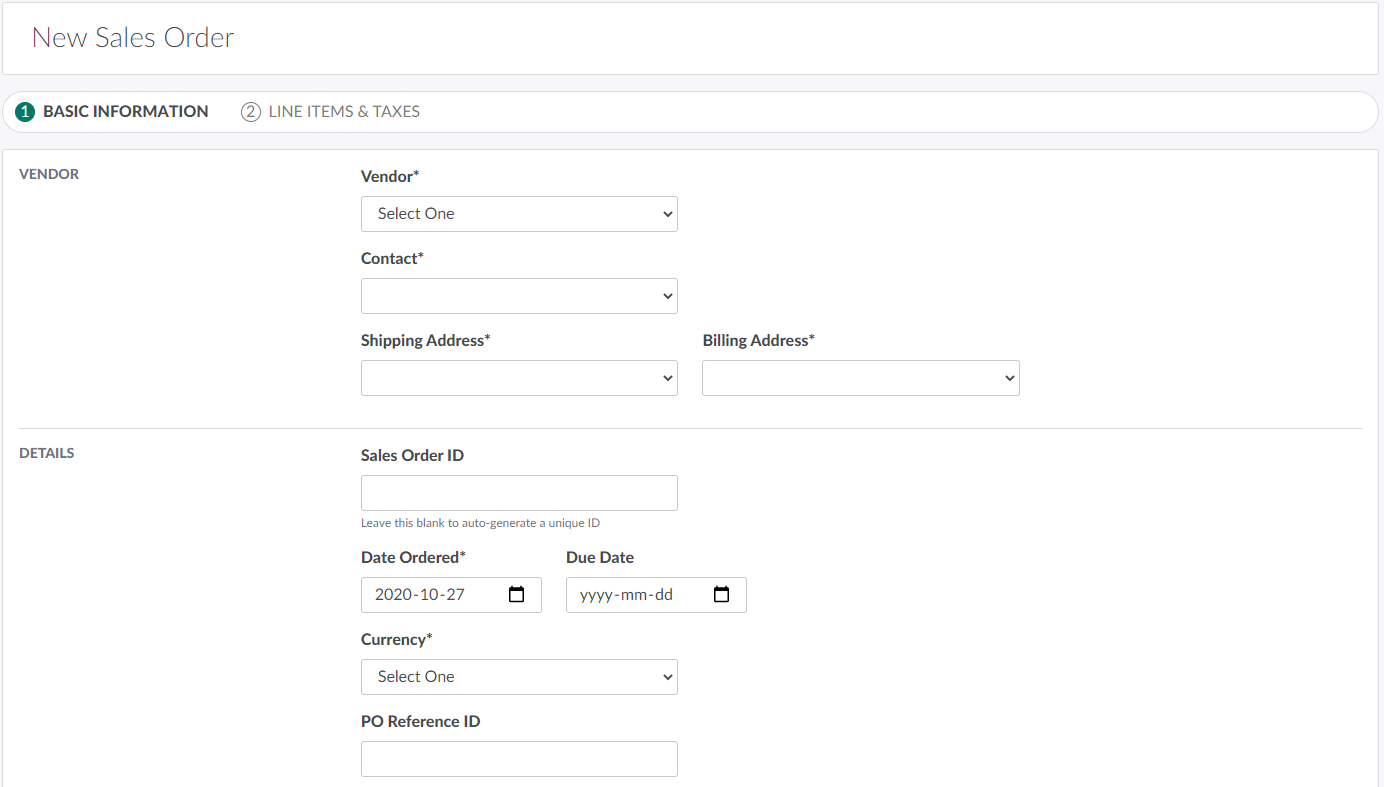
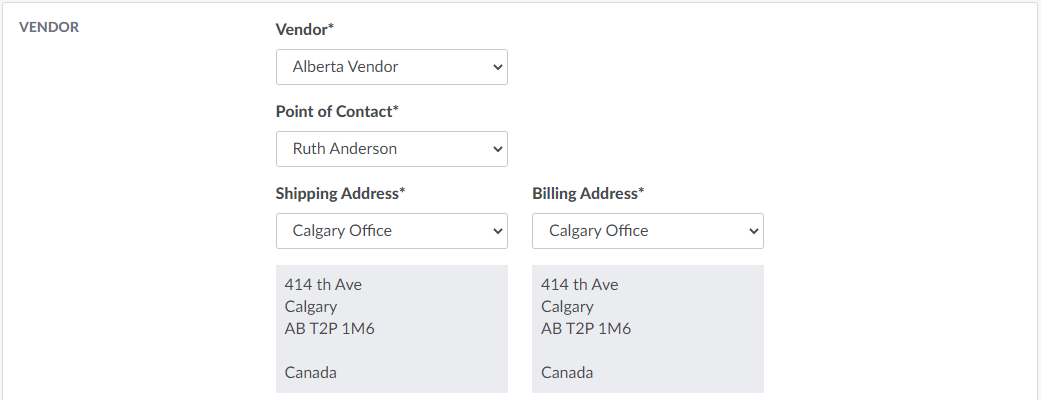
Enter vendor information in the Vendor section.
-
Vendor: Select an approved vendor from the provided drop-down menu.
- Visit the Vendors tab to Add a New Vendor.
-
Contact: Select a vendor contact from the provided drop-down menu.
- Visit the Vendor's Profile to Add a New Vendor Contact.
-
Shipping Address: Select the vendor's shipping address from the provided drop-down menu.
- Visit the Vendor's Profile to Add a New Vendor Address.
-
Billing Address: Select the vendor's billing address from the provided drop-down menu.
-
-
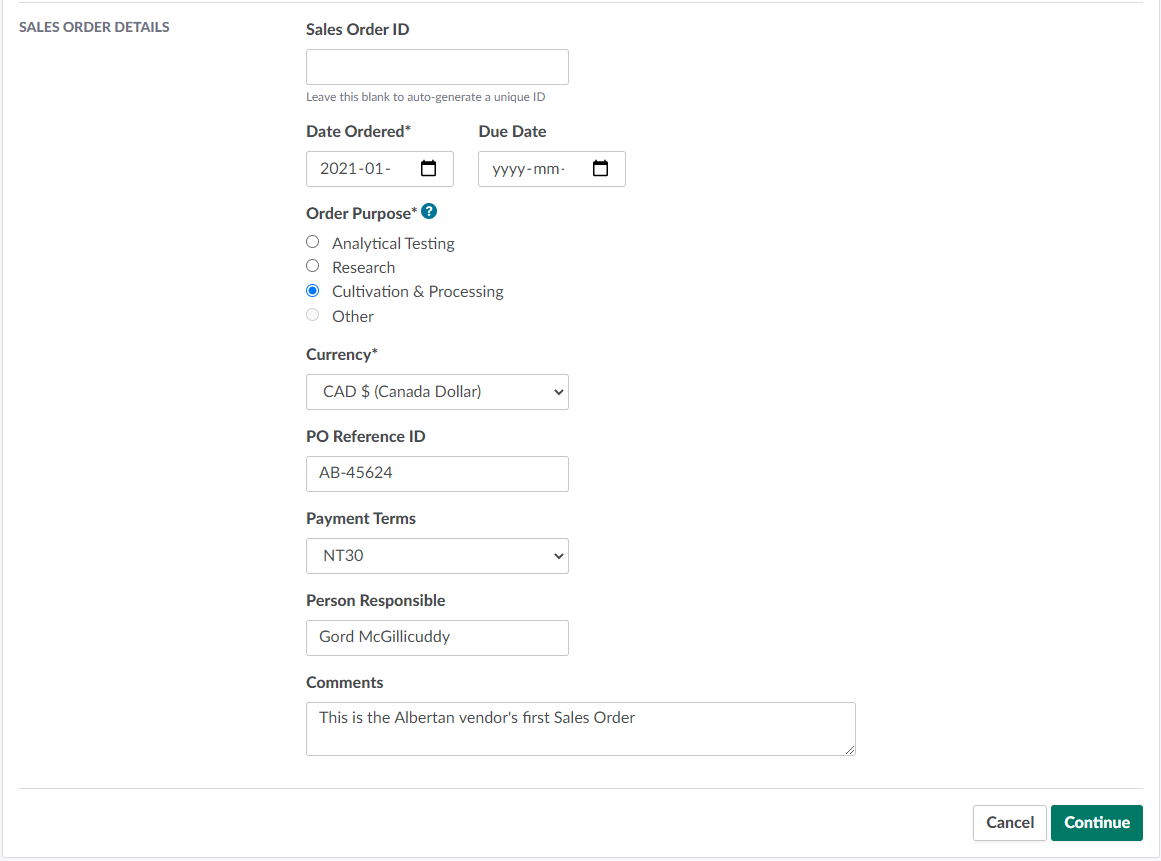
Enter information about the Sales Order in the Details section.
-
SO ID: The Sales Order's ID code. Leave this field blank to generate a unique ID.
-
Date Ordered: The date on which the order was placed.
-
Due Date: The date on which the Sales Order is due.
-
Order Purpose: The Sales Order's intended purpose. The options available depend on the license types at the vendor's shipping address. This selection will affect totals on the monthly CTLS and CRA reports.
-
Currency: The type of currency the order will use.
-
PO Reference ID: The corresponding purchase order's reference ID code.
-
Payment Terms: The Sales Order's payment terms.
- Visit the Wholesale Settings tab to Add a New Payment Term.
-
Person Responsible: The person responsible for seeing the Sales Order through to completion.
-
Comments: Additional details about the Sales Order.
-
-
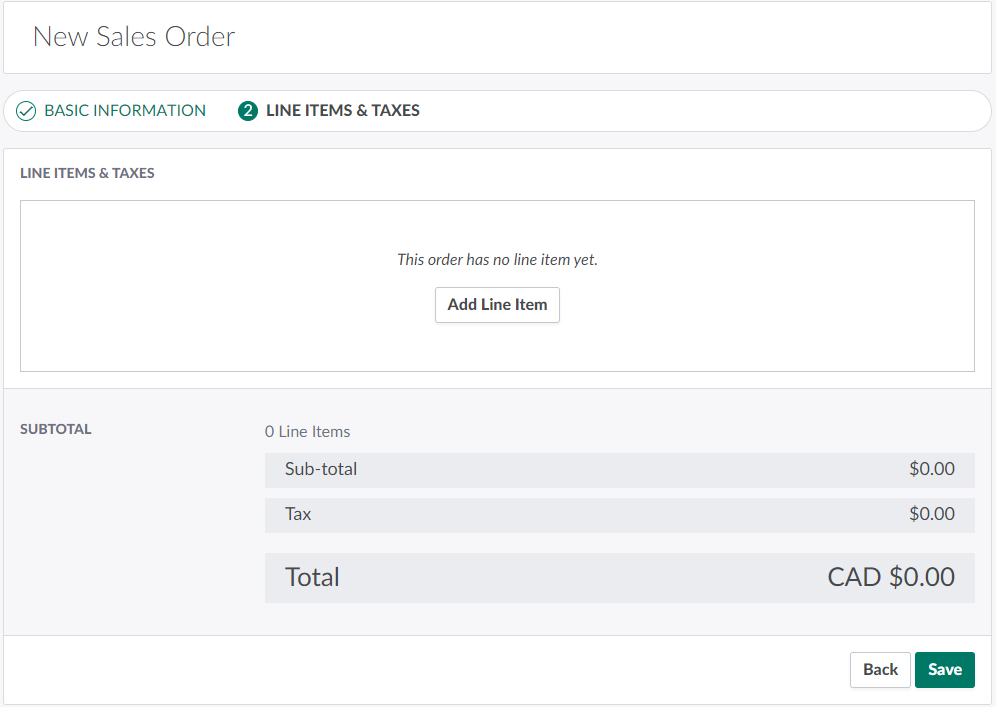
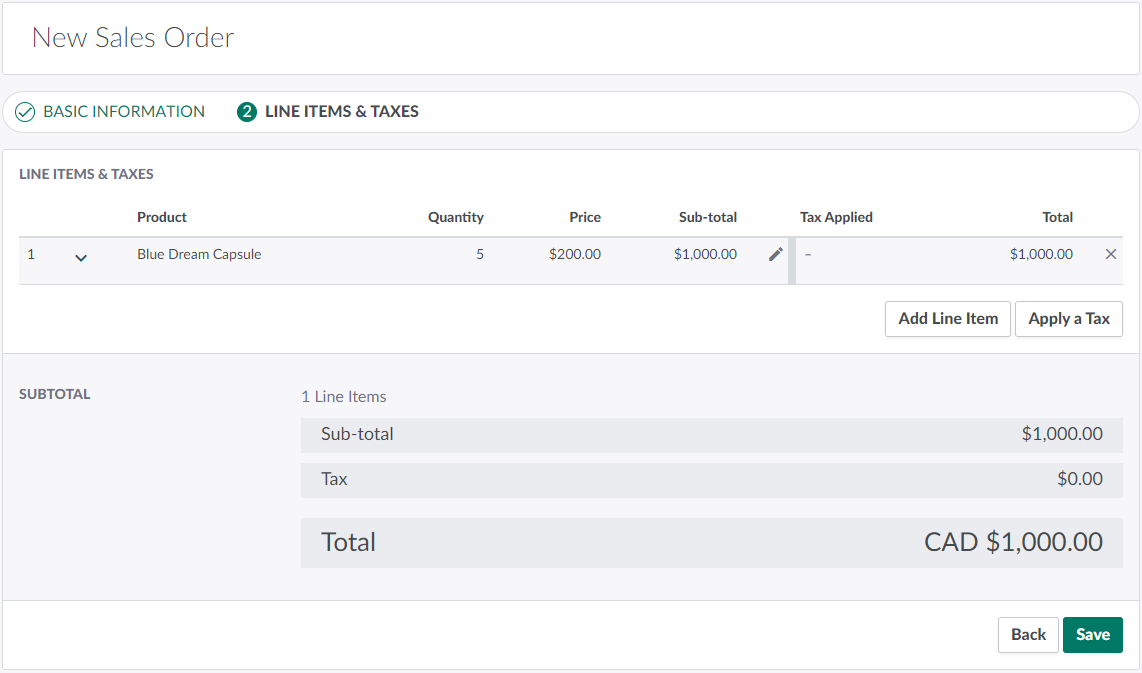
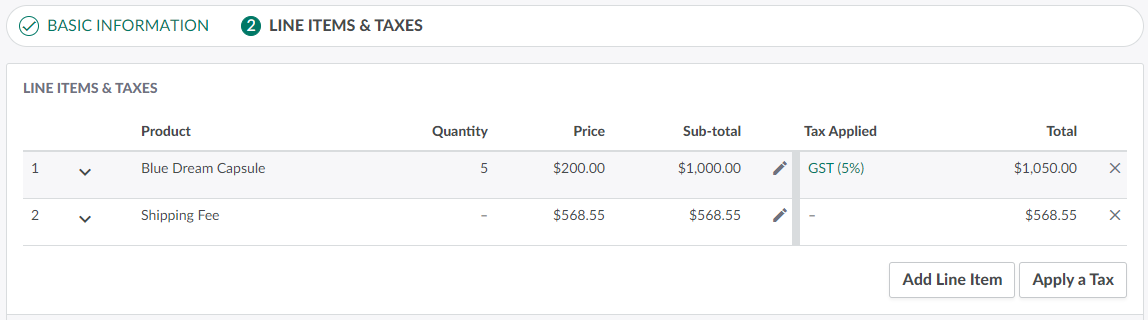
Click Continue to proceed to Step 2: Line Items & Taxes.
-
Add packaged line items.
-
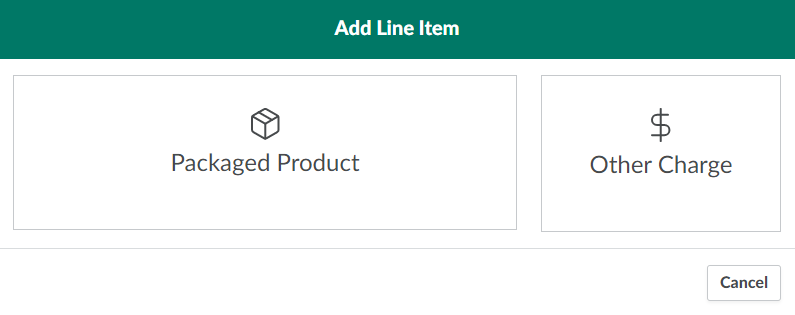
Click Add Line Items to summon a modal to select line items.
-
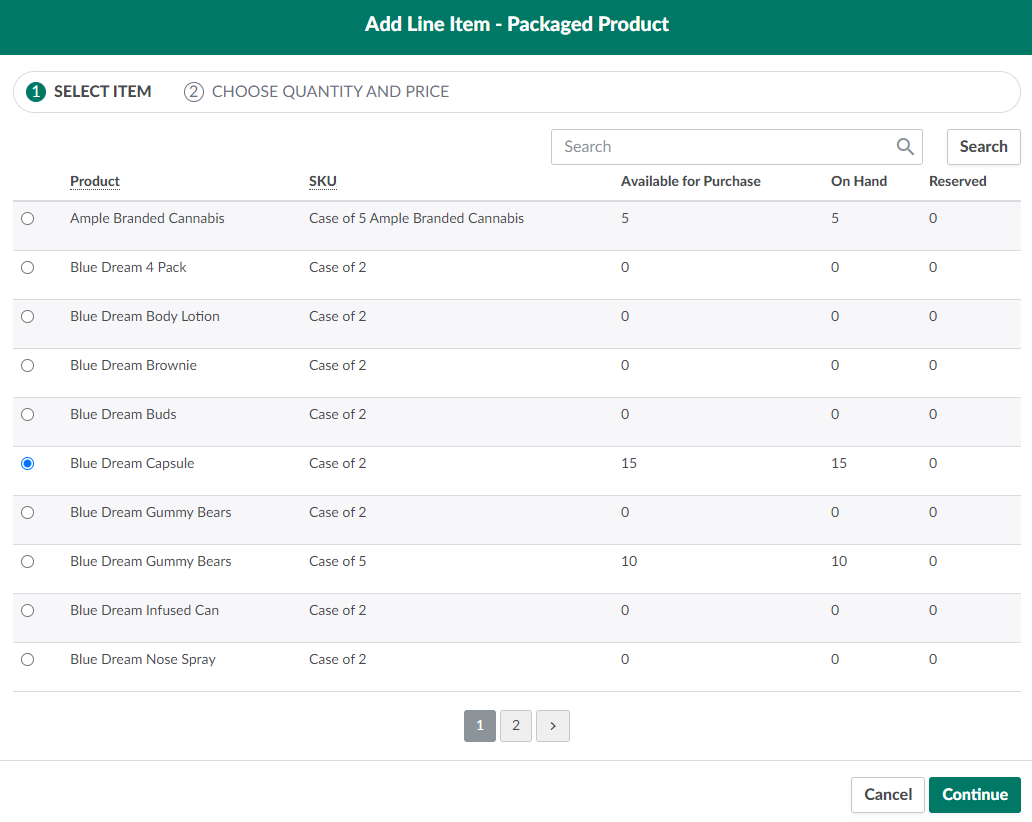
Click Packaged Product. This opens the Add Line Item workflow on Step 1: Select Item. The tab includes a menu of Case SKUs saved to your Seed-to-Sale environment.

-
Select a line item by checking a radio button in the leftmost column.
-
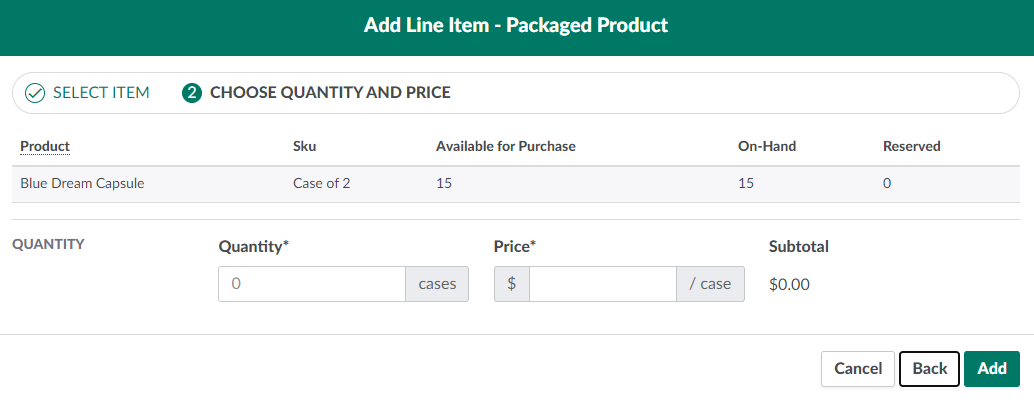
Click Continue to proceed to Step 2: Choose Quantity and Price.
-
Enter the number of cases in the order and the price per unit in the fields provided. The Sales Order will multiply the SKU quantity by the price to calculate the line item's total price.
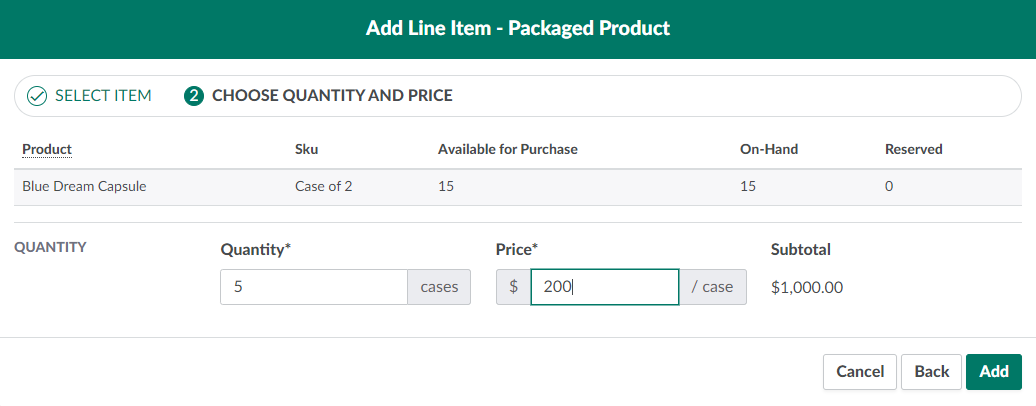
-
Click Add to pull the line item into the Sales Order.
-
Repeat as necessary.
-
-
Add other charges, if necessary. This is useful for adding costs that are not covered by pre-set values like taxes or products, such as packaging or shipping fees.
-
Click Add Line Items to summon a modal to select line items.
-
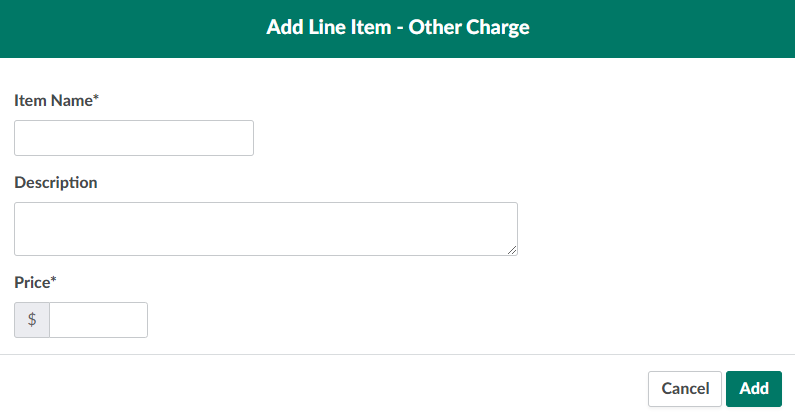
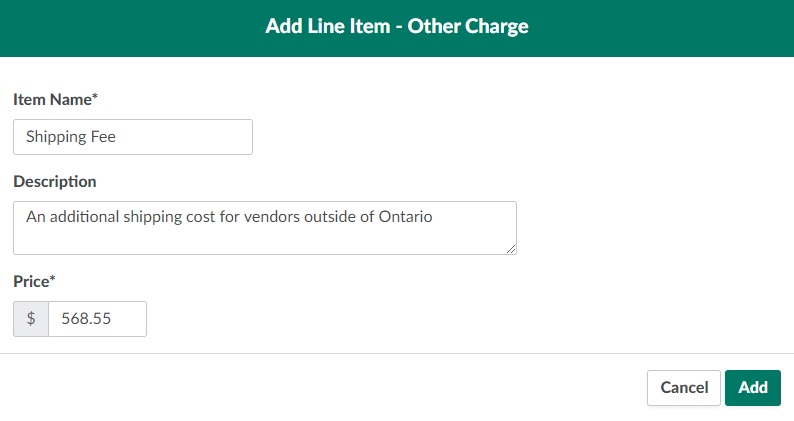
Click Other Charge.
-
Enter the item's name and price in the fields provided, and write a brief description of the charge.
-
Click Add to apply the charge.
-
-
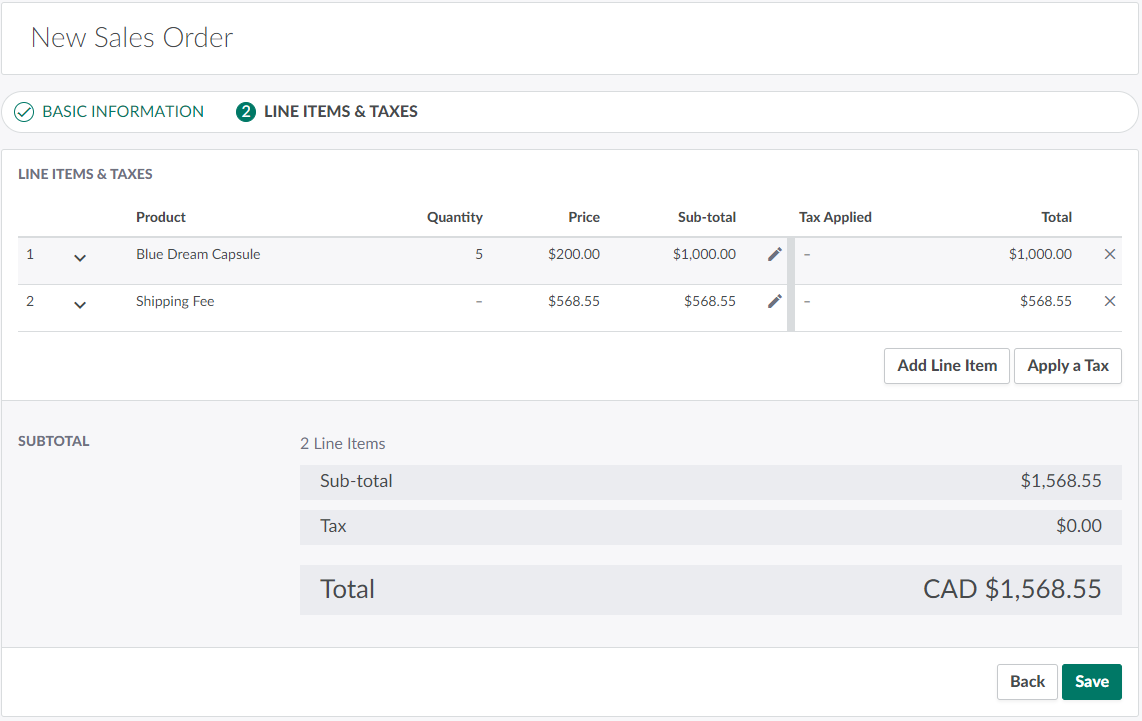
Apply taxes to each line item.
-
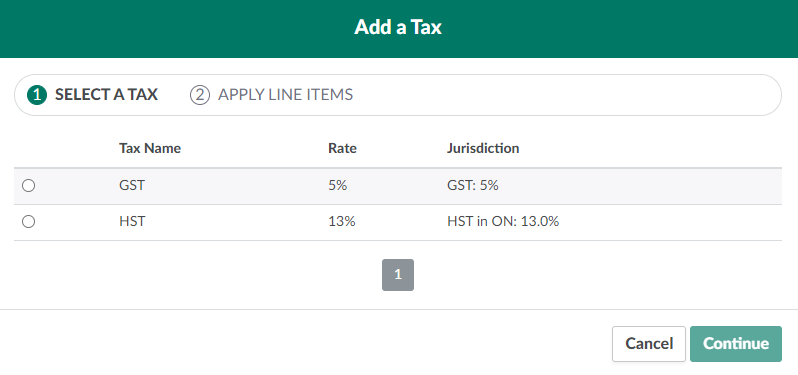
Click Apply a Tax to open a menu of tax types.
-
Select a tax type and click Continue.
-
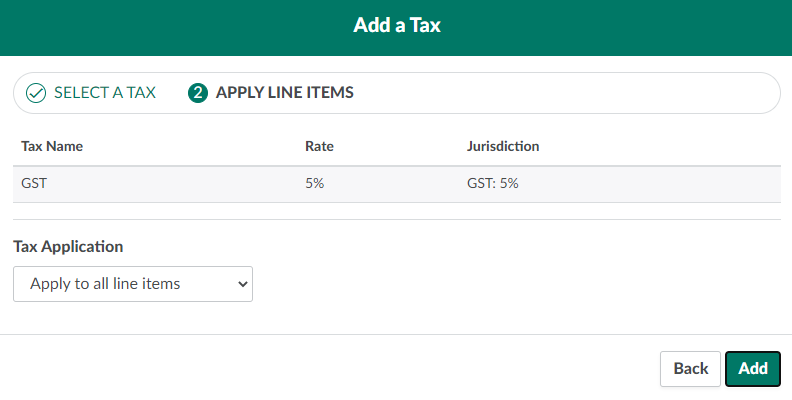
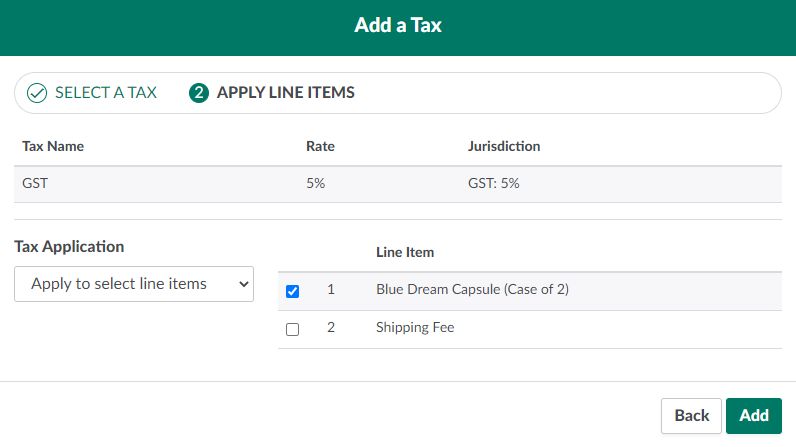
Indicate whether the tax type will apply to all line items in the Sales Order, to specific line items, to only cannabis products, or only other charges.
-
To apply the tax to specific line items, indicate which line items will use the tax type by checking their boxes.
-
-
Click Add to apply the tax type.
-
Repeat until all line items have a tax type assigned. You can apply multiple tax rates to a single line item if there are overlapping jurisdictions.
-
-
Click Save to finalize the Sales Order.
Once the sales order is complete, Approve the Sales Order and Download a Sales Order Invoice.