Vendors are wholesale purchasers who submit bulk orders to the license holder. Each vendor can have multiple licence numbers–one for each address associated with the vendor.
Required permission(s): vendor_read, vendor_update
-
In the Wholesale application, open the Vendors tab.
[img vendors-index] -
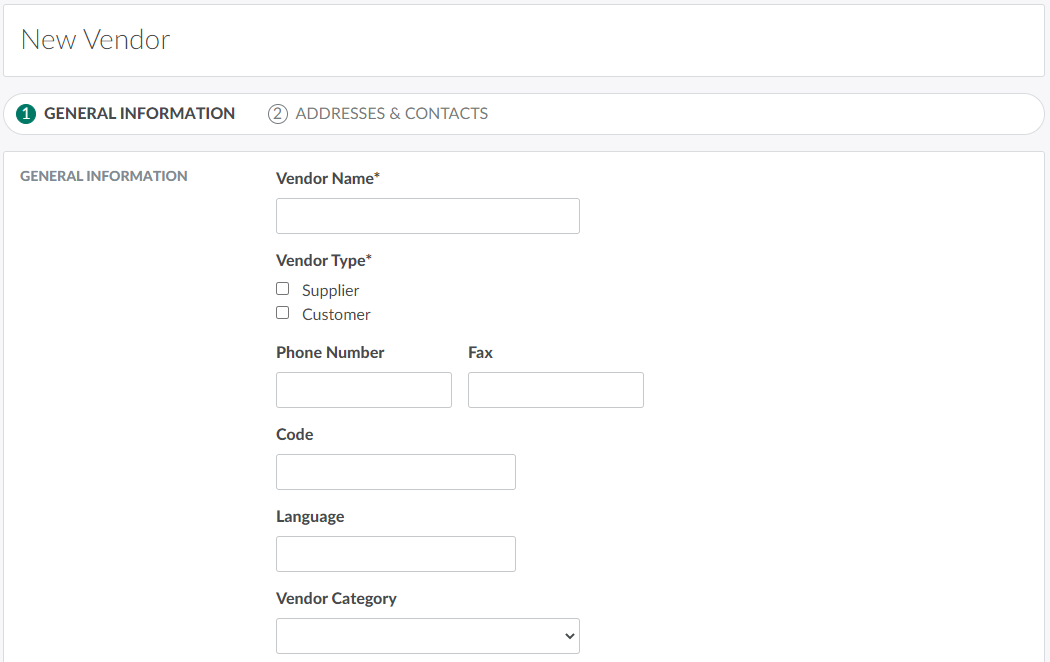
Click New to open a blank Vendor Profile on Step 1: General Information.
-
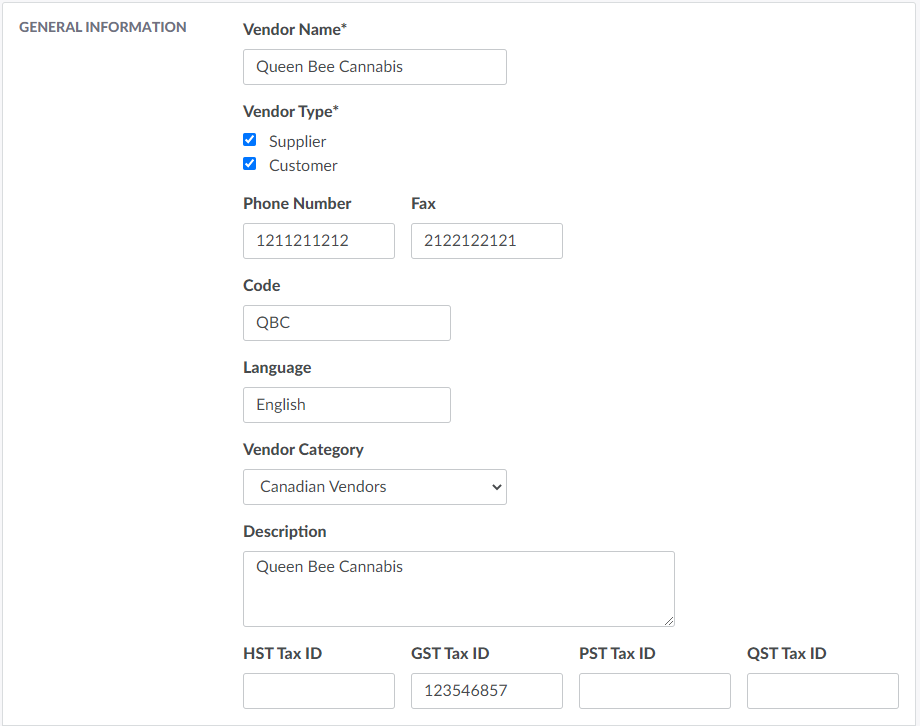
Configure the vendor’s General Information in the fields provided. An asterisk* denotes a required field.
-
Vendor Name: The vendor’s name.
-
Vendor Type: Indicates whether the vendor is a wholesale supplier, customer, or both.
-
Phone Number: The vendor’s primary phone number.
-
Fax: The vendor’s primary fax number.
-
Code: The vendor’s abbreviated code.
-
Language: The vendor’s primary language.
-
Vendor Category: The vendor’s category. Vendor categories are a method used to group vendors with similar properties.
- Visit the Settings tab to Add a New Vendor Category.
-
Description: A brief description of the vendor.
-
Tax ID(s): The vendor’s HST, GST, PST, and QST tax numbers, if applicable.
-
-
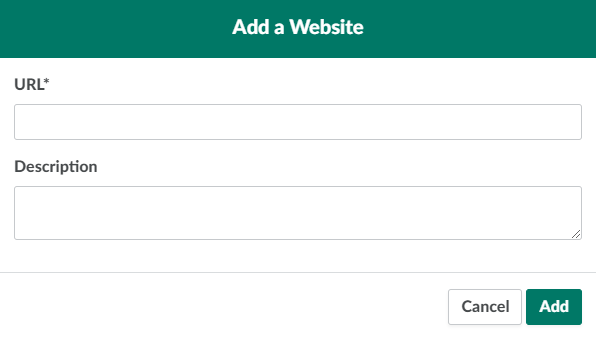
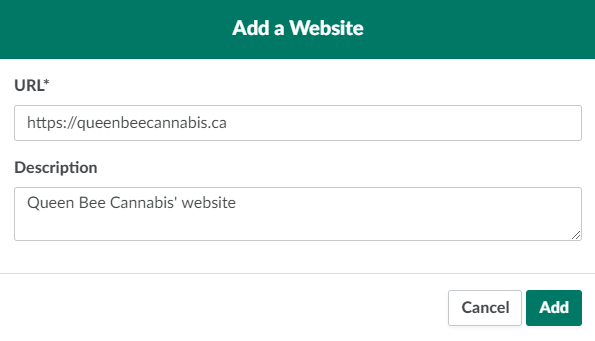
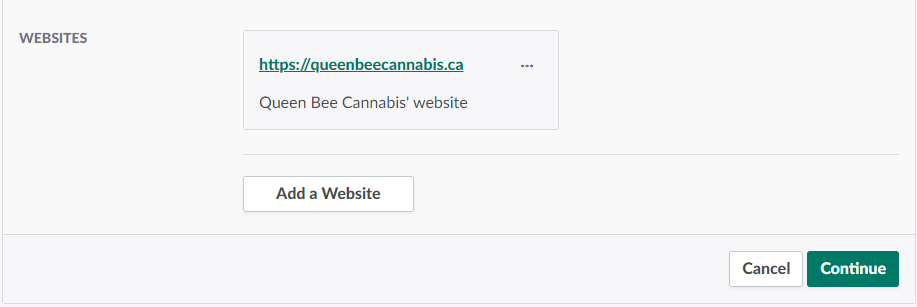
Add the vendor's website information, if applicable.
-
In the Websites section, click Add a Website.
-
Enter the website's URL in the field provided, and write a brief description.
-
Click Add to save the website. Repeat as necessary.
-
-
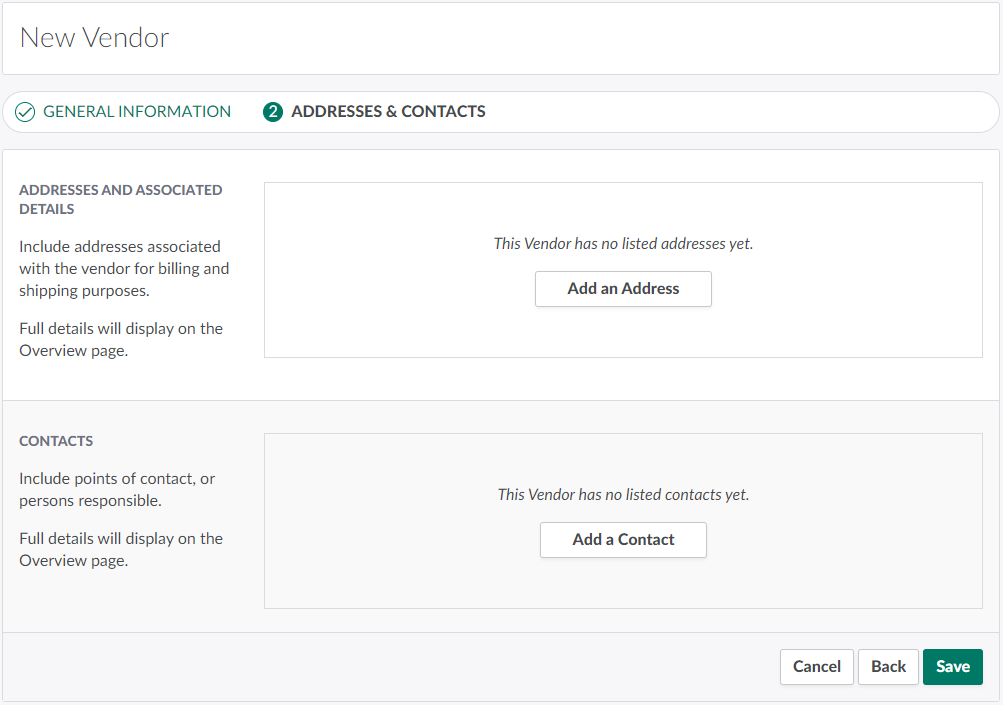
Click Continue to proceed to Step 2: Addresses & Contacts.
-
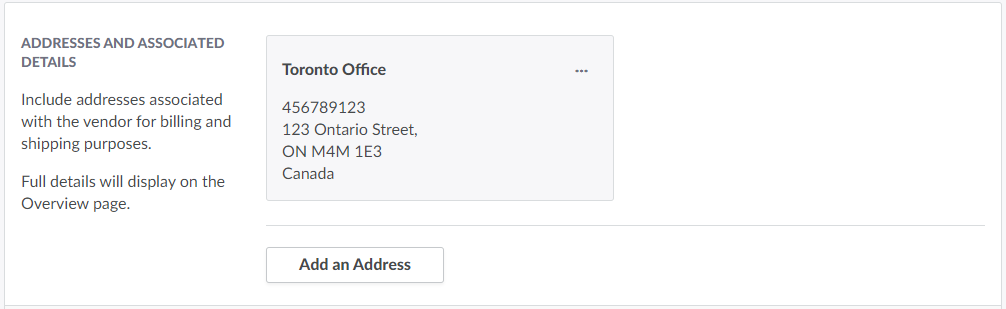
Configure the details of at least one shipping/billing address associated with the vendor.
-
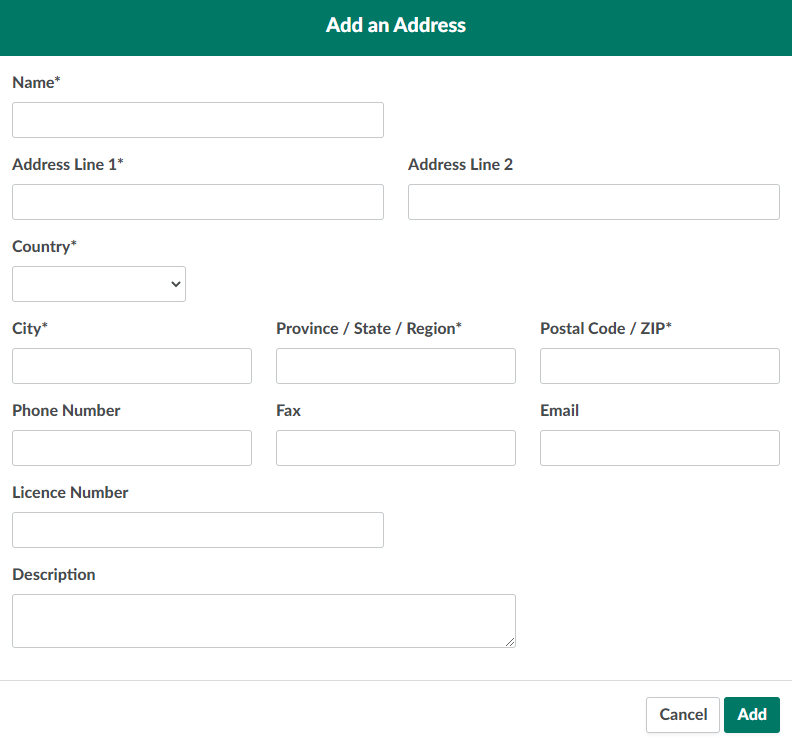
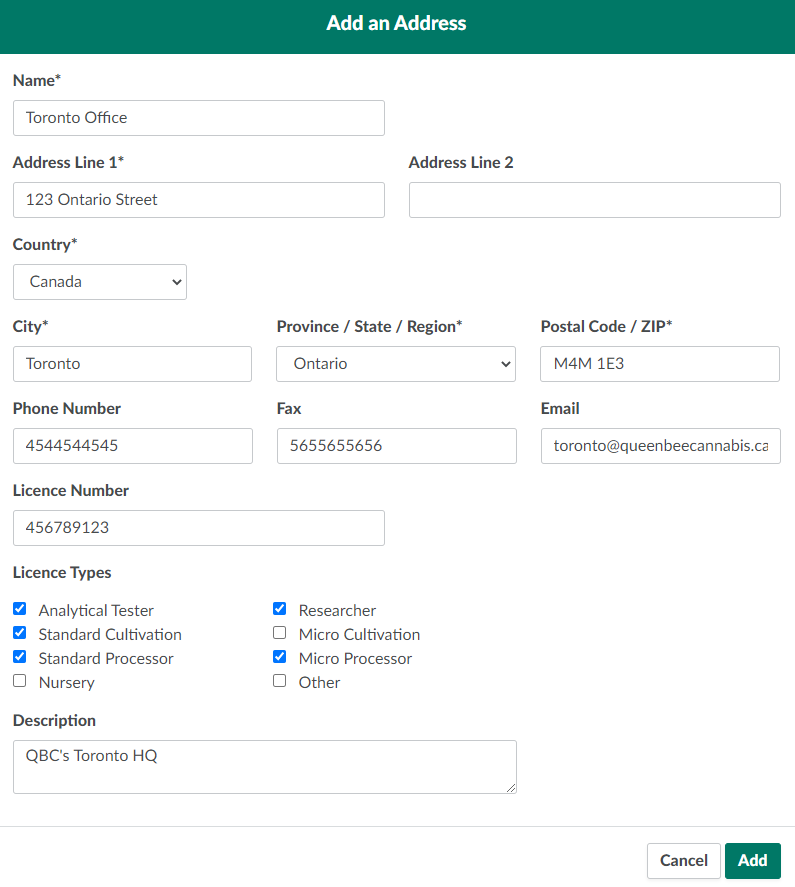
In the Addresses and Associated Details section, click Add an Address. This opens a modal.
-
Enter the address in the fields provided. An asterisk* denotes a required field.
-
Name: The location's name.
-
Address Line 1/2: The location’s address.
-
City: The location’s city.
-
Province/State/Region: The location’s province/state/region
-
Postal Code / ZIP: The location’s postal/ZIP/mailing code.
-
Country: The location’s country.
-
Phone Number: The location’s primary phone number.
-
Fax: The location’s primary fax number.
-
Email: The location’s primary email address.
-
Licence Number: The location’s licence number. Each address may have a unique licence number.
-
Licence Types: Describes the nature of the licence. The options selected here affect which options appear when setting a Sales Order's purpose.
- These options only appear if the address is in Canada.
-
Description: A brief description of the location.
-
-
Click Add to save the address. Repeat as necessary.
-
-
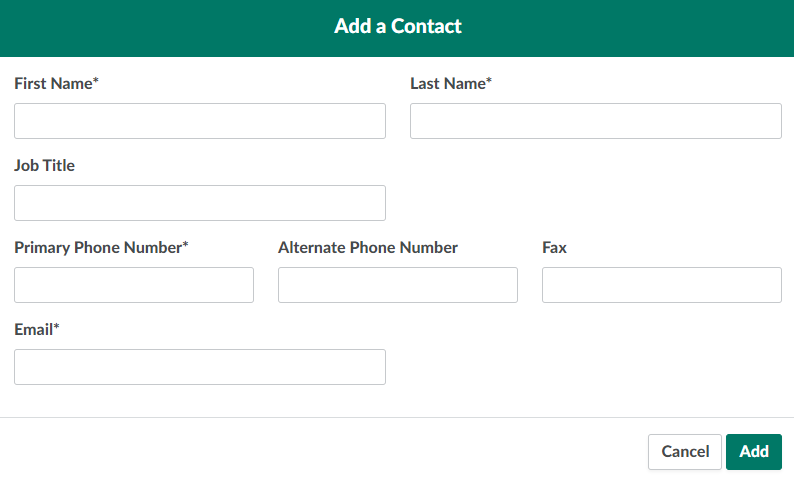
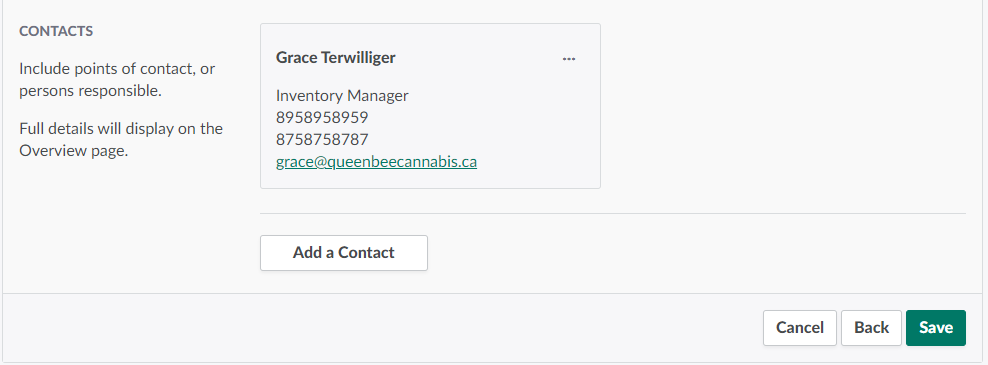
Configure at least one point of contact.
-
In the Contacts section, click Add a Contact. This opens a modal.
-
Enter the contact's information in the fields provided.
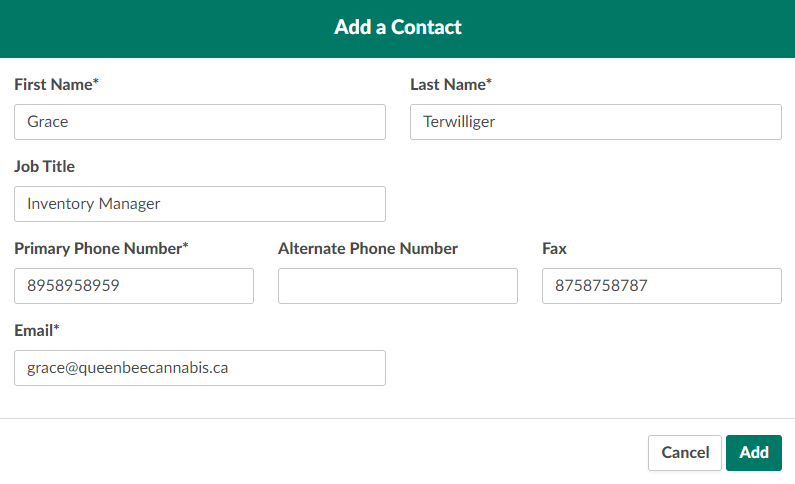
- First Name: The contact’s first name.
- Last Name: The contact’s surname.
- Job Title: The contact’s job title.
- Primary Phone Number: The contact’s primary phone number.
- Alternate Phone Number: The contact’s alternate phone number.
- Fax: The contact’s fax number.
- Email: The contact’s email address.
-
Click Add to save the contact. Repeat as necessary.
-
-
Click Save to finalize the new vendor.

Before a licence holder can create a Sales Order for the new vendor, the vendor must be Approved.