After Adding Received Inventory, you should immediately label the EA units. Labels identify each unit by a unique ID number, and depending on the label type, may include other information necessary to sell the units.
Required permission(s): product_read, received_inventory_read
-
In the Products module, select a product.
[img product-overview] -
Select a SKU to open the SKU's Profile.
[img sku-overview] -
Open the Inventory tab.
[img sku-packaging-runs] -
Switch to the Received Inventory sub-tab.
[img sku-received-inventory] -
Locate the Received Inventory in question, and click the

icon in the leftmost cell to open a menu of options.
[img received-inventory-menu] -
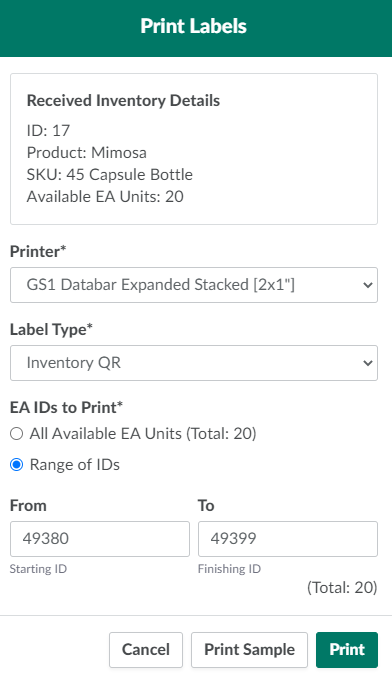
Select Print Labels. This opens a printing modal.
-
Select a printer from the drop-down menu provided.
-
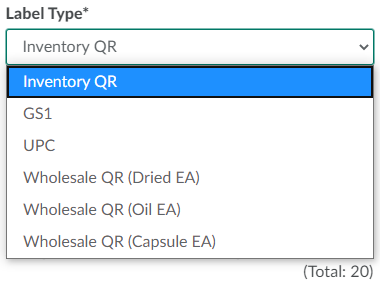
Select a label type from the Label Type drop-down menu. Options are:
-
Inventory QR: Generic QR code labels for inventory management purposes.
-
GS1: Labels that include the SKU's GS1 number.
-
UPC: Labels that include the SKU's UPC number.
-
Wholesale QR (Dried EA, Oil EA, or Capsule EA): QR code labels to facilitate inventory management in the wholesale workflow. These labels differ slightly depending on whether the product is Dried, Oil, or Capsule.
-
-
Complete the remaining fields. These fields will differ based on the label type selected.
-
Inventory QR
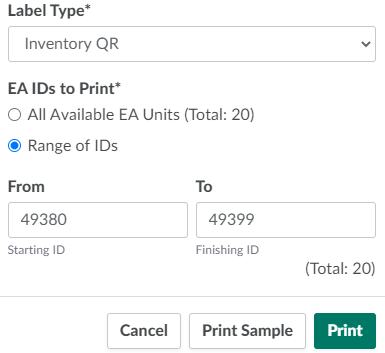
- Check All Available EA Units (Total: #) to print labels for all EA units, or check Range of IDs to specify a range of bottle ID labels to print.
-
GS1
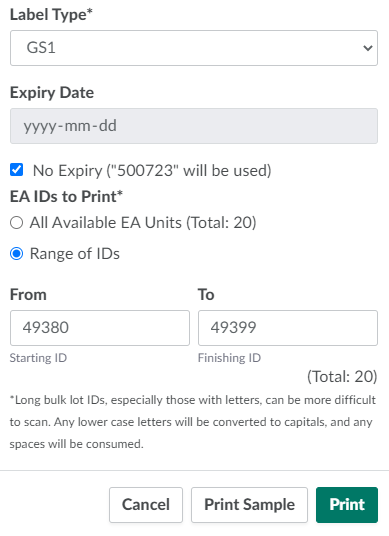
- Select an expiry date in the field provided, or check No Expiry.
- Check All Available EA Units (Total: #) to print labels for all EA units, or check Range of IDs to specify a range of bottle ID labels to print.
-
UPC
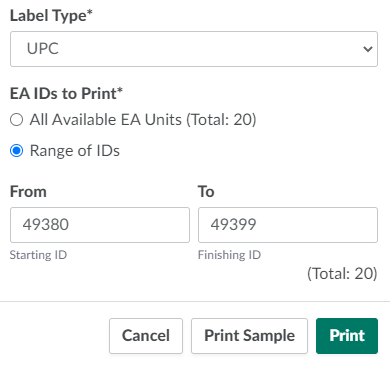
- Check All Available EA Units (Total: #) to print labels for all EA units, or check Range of IDs to specify a range of bottle ID labels to print.
-
Wholesale QR
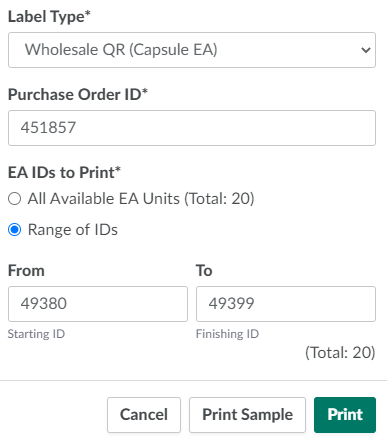
- Enter the associated Purchase Order's reference ID string in the field provided.
- Check All Available EA Units (Total: #) to print labels for all EA units, or check Range of IDs to specify a range of bottle ID labels to print.
-
-
Click Print Sample to print a sample label.
- If the sample has a printing error, diagnose the printing issue before proceeding to the next step.
-
Click Print to print labels for the EA units. Affix the labels to the EA units immediately.
From the Received Inventory sub-tab, you can also Release Received Inventory for public sale or Reclaim Bottles.