Before you can access seed-to-sale functions through the Gun App, each gun must be connected to the license holder's wireless network. This allows the scanner gun to connect with the Seed-to-Sale software's database to access and update data in real-time.
-
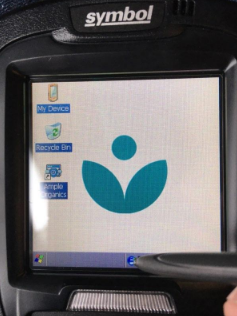
Use the stylus to tap on the circular menu icon. This opens a menu of options.
-
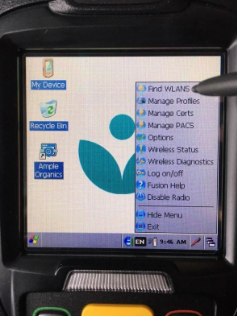
Select Find WLANs.
-
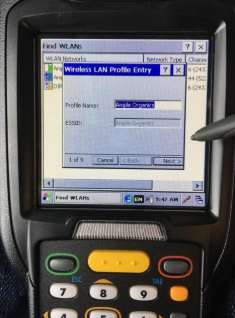
Locate the desired wireless network, and select Create Profile. This opens the Wireless LAN Profile Entry modal.
-
Enter a name for the new profile in the field provided, and click Next.
-
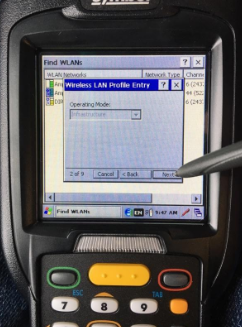
In the Operating Mode drop-down menu, Infrastructure will already be selected. Click Next again.
-
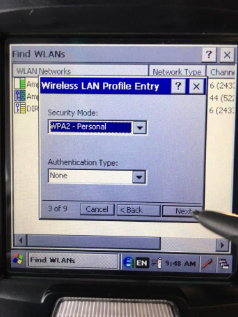
Open the Security Mode drop-down menu, and select WPA2-Personal. In the Authentication Type drop-down menu, select None. Click Next to proceed.
-
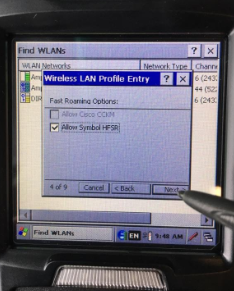
Under Fast Roaming Options, leave the Allow Symbol HFSR box checked. Click Next.
-
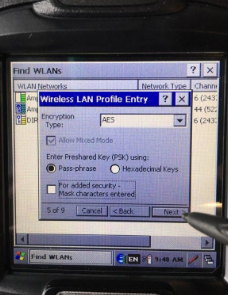
Under Encryption Type, select AES. Under Enter Preshared Sky (PSK), select Pass-phrase.
-
Optional*: Check or uncheck masked characters for added security.*
-
-
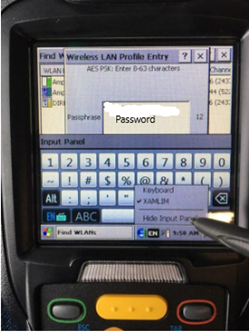
Tap the stylus icon and select XAMLIM to bring up the keyboard. Enter the password for the selected wireless network.
-
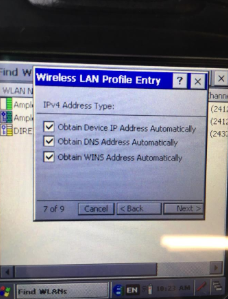
Under IPv4 Address Type, leave all boxes checked and click Next.
-
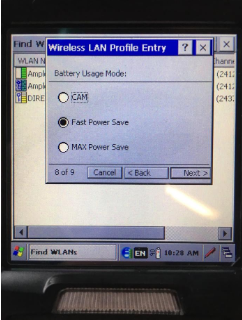
Under Battery Usage Mode, select Fast Power Save, and click Next.
-
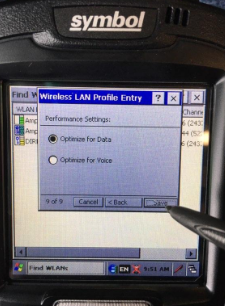
Under Performance Settings, select Optimize for Data.
-
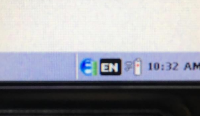
Click Save. If the gun has successfully connected to the wireless network, the red stripe on the circular icon will change to green.
After connecting to a wireless network, open the Seed-to-Sale software and Log Into the Gun App.