After creating cases through a Casing Run you should immediately label the cases. Labels identify each case by a unique ID number and include information about the contents of each case. When stockpiling inventory for future purposes, mark each case with an Internal Case [4x6"] label to facilitate inventory management. Once cases are sold to vendors through the Wholesale application, return to this tab to print province-specific labels.
Required permission(s): product_read, casing_run_read
-
In the Products module, select a product.
[img product-overview] -
Select a SKU to open the SKU's Profile.
[img sku-overview] -
Open the Cases tab.
[img sku-cases] -
Select a Case SKU to open the Case SKU's Profile.
[img case-sku-overview] -
Open the Casing Runs tab.
[img casing-runs] -
Select the Casing Run with cases to label, and click the

icon to open a menu of options.
[img casing-run-menu] -
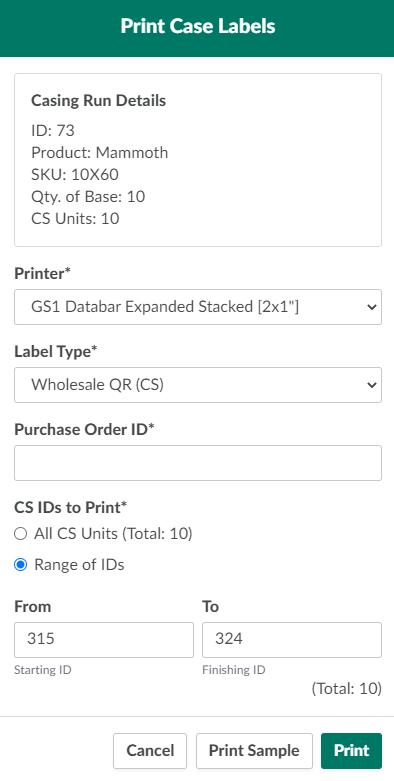
Select Print Case Labels. This opens a printing modal.
-
Select a printer from the drop-down menu provided.
-
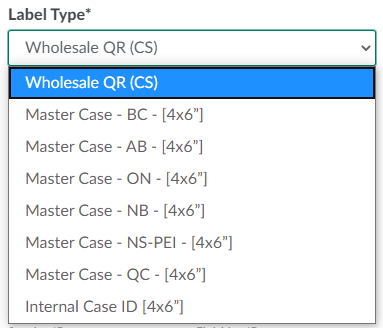
Select a label type from the Label Type drop-down menu. Options are:
-
Wholesale QR (CS): Generic QR code labels.
-
Master Case - *select province* - [4x6"]: Labels that meet the case labeling regulations of the destination province. Print these labels once cases have been sold and the destination province is known.
-
Internal Case ID [4x6"]: Labels for internal use that identify each case's ID number; packaging date; associated product, SKU, and Bulk Lot; and the ID numbers of each inventory source–Packaging Run or Received Inventory–that contributed to the case, as well as how many EA units came from each source. Use these labels to identify each case and its contents when stockpiling inventory before applying province-specific case labels.
-
-
Complete the remaining fields. These fields will differ based on the label type selected.
-
Wholesale QR (CS)
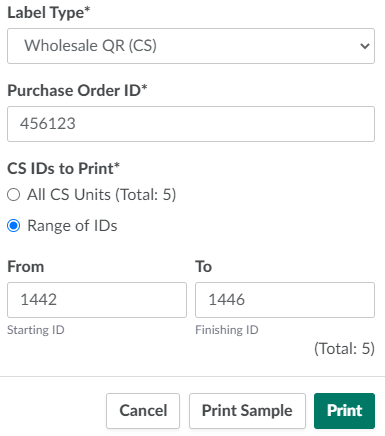
- Enter the purchase order's reference ID in the field provided.
- Check All CS Units (Total: #) to print labels for all cases in the Casing Run or check Range of IDs to specify a range of case ID labels to print.
-
Master Case - *select province* - [4x6"]

- Select an expiry date in the field provided, or check No Expiry.
- Check All CS Units (Total: #) to print labels for all cases in the Casing Run, or check Range of IDs to specify a case range.
-
Internal Case ID [4x6"]
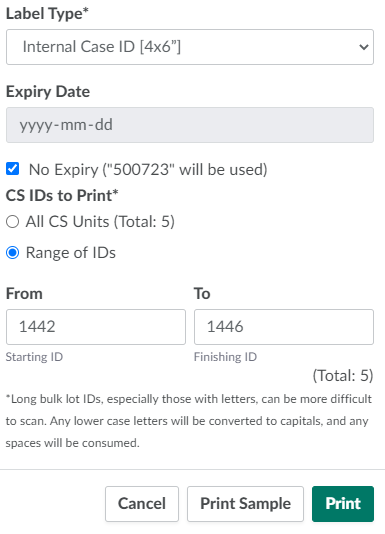
- Select an expiry date in the field provided, or check No Expiry.
- Check All CS Units (Total: #) to print labels for all cases in the Casing Run, or check Range of IDs to specify a case range.
-
-
Click Print Sample to print a sample CS unit label.
- If the sample has a printing error, diagnose the printing issue before proceeding to the next step.
-
Click Print to print the case labels. Affix the labels to the cases immediately.

From the Casing Runs tab, you can also Create a Casing Run or Restock Cases.